
The breaker block and order block indicator does not just mark a zone and leave it there. Each block gets tracked through its whole life: created by an impulse, revisited for a mitigation, broken, then flipped into a breaker that price can retest from the other side. Four buffers mark those events.
This build ships as a compiled .ex4 for MT4 and .ex5 for MT5; the screenshots below come from EURUSD H1.
| Platforms | MT4 (.ex4) + MT5 (.ex5) |
|---|---|
| Chart window | Main price chart |
| Plots | 4: OB Mitigation Buy, OB Mitigation Sell, Breaker Flip Buy, Breaker Flip Sell |
| Alerts | popup, push notification, email, sound |
| Inputs | 19 |
Plots, colours and placement
OB Mitigation Buy marks price returning into a bullish zone that has not broken yet.
OB Mitigation Sell is the same on a bearish zone.
Breaker Flip Buy marks a retest of a bearish zone that already broke, so the level has changed sides.
Breaker Flip Sell mirrors that case.
Rectangle objects draw each zone with InpZoneTransparency shading, and text objects label them.
- OB Mitigation Buy: arrow, lime, width 2, arrow code 233
- OB Mitigation Sell: arrow, tomato, width 2, arrow code 234
- Breaker Flip Buy: arrow, dark green, width 2, arrow code 225
- Breaker Flip Sell: arrow, maroon, width 2, arrow code 226

What happens on each bar
Creating a block
An impulse needs the close to move at least InpImpulseAtrMult times the ATR away from the previous close, with the candle body pointing the same way.
The code then walks back for the last candle closing against that direction. That candle becomes the zone, and its creation time gets stored alongside it.
Mitigation versus a break
Every stored block gets checked against each later bar. Price trading back into an unbroken zone counts as a mitigation, and the matching buffer marks that bar.
A close beyond the far edge is different: the block gets stamped with a break time rather than removed. From then on it is a breaker rather than an order block.
The flip
Once broken, the zone stays on the chart with its role reversed. A bullish zone that broke downward becomes resistance, and price returning up into it marks a Breaker Flip Sell.
InpMaxOpenBlocks caps how many zones stay tracked, and InpLookbackBars caps how far back the scan builds them.
How to work with it
A mitigation marker and a flip marker mean opposite things about the same zone, so the block state matters more than its price.
Zone colour changes between the order block and breaker colours, which is how you tell the state at a glance.
Every block carries a creation time, so a zone never reacts to bars that came before it existed.
A long run of markers on one zone means price kept revisiting the same level rather than several levels working.
Alert channels in this build: popup, push notification, email and sound, one message per closed bar.
Alerts cover popup, push, email and sound on each mitigation or flip. A bar time check keeps it to one alert per closed bar.
Every Breaker Block and Order Block Indicator input
Core settings
| Setting | What it does | Default |
|---|---|---|
InpAtrPeriod |
ATR period. InpAtrPeriod is the volatility window the impulse threshold is built from, 14 by default. | 14 |
InpImpulseAtrMult |
Impulse threshold (close-to-close move >= mult * ATR). InpImpulseAtrMult is how many ATRs a close has to move to count as an impulse. It defaults to 1.5, and raising it towards 2.5 creates far fewer zones. | 1.5 |
InpMaxOpenBlocks |
Max active OBs tracked. InpMaxOpenBlocks caps how many zones stay tracked at once, 12 by default. | 12 |
InpLookbackBars |
Lookback bars (recent N closed bars). InpLookbackBars limits how far back the scan builds zones, 600 by default. | 600 |
InpZoneTransparency |
Rectangle fill (0=solid, 100=transparent) – informational. InpZoneTransparency shades each rectangle, 80 by default, so the candles stay readable through it. | 80 |
InpObjPrefix |
Chart object prefix. | FXMTS_BOB_ |
Display settings
| Setting | What it does | Default |
|---|---|---|
InpShowBullishOB |
Draw bullish OB zones. | on |
InpShowBearishOB |
Draw bearish OB zones. | on |
InpBullOBColor |
Bullish OB color. | lime |
InpBearOBColor |
Bearish OB color. | tomato |
InpBullBreakerColor |
Bullish OB -> Breaker color. | maroon |
InpBearBreakerColor |
Bearish OB -> Breaker color. | dark green |
InpArrowOffsetPts |
Arrow offset in points. InpArrowOffsetPts is the cosmetic gap between a marker and its candle, 20 points by default. | 20 |
Alert settings
| Setting | What it does | Default |
|---|---|---|
InpEnableAlerts |
Master alert switch. InpEnableAlerts gates the message block and defaults to true. | on |
InpEnablePopup |
Popup alerts. | on |
InpEnablePushNotify |
Push notifications. | off |
InpEnableEmail |
Email alerts. | off |
InpEnableSound |
Sound alerts. | off |
InpSoundFile |
Sound file. | alert.wav |
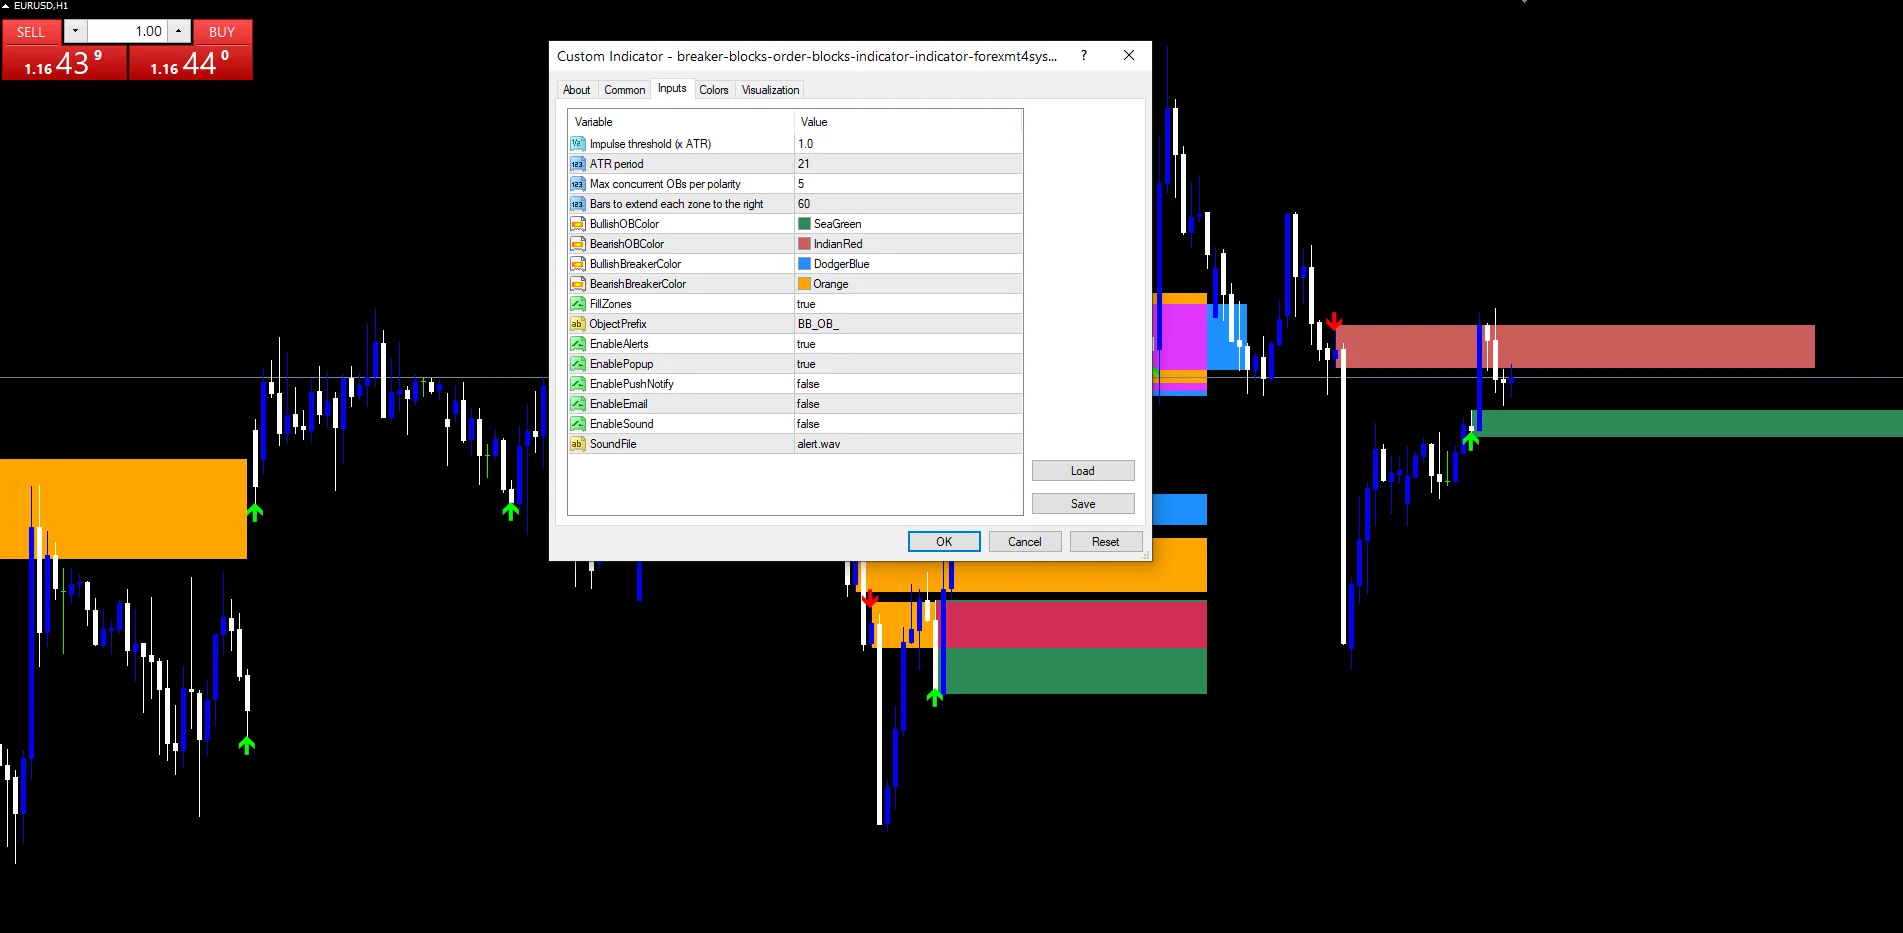
Markets and timeframes
The screenshot uses EURUSD H1. Scaling the impulse by ATR lets one InpImpulseAtrMult travel between symbols without retuning. H1 and H4 give zones that stay relevant long enough to be retested. On M1 and M5 the zones pile up around news and most get run through in minutes.
Where it falls short
The impulse test compares two closes and one candle body, so a gap over a weekend can create a zone nothing actually traded through.
One candle becomes the zone, while a real origin often spans a small cluster of them.
A close a single point beyond the edge breaks a block exactly like a decisive one, since nothing measures how far the break travelled.
With InpMaxOpenBlocks at 12, older zones stop being tracked whether or not price was heading back towards them.
Copy the compiled Breaker Block and Order Block Indicator file into your MQL4/Indicators folder, and the MT5 build into MQL5/Indicators, then restart the terminal and drag it onto a chart. The step-by-step guide with screenshots is at how to install MT4 and MT5 indicators.
Background reading on the method behind the Breaker Block and Order Block Indicator: Block trade on Wikipedia, Flag at Investopedia.
Download the Breaker Block and Order Block Indicator for MT4 and MT5
The zip holds the compiled Breaker Block and Order Block Indicator build for MT4 and MT5, plus a short README. Compiled files only, no source. Enter your email below and the download link arrives in your inbox.
Download this indicator free
Enter your email and the file is yours. You also get the full MT4 and MT5 library.
FAQ
What is the difference between a mitigation and a breaker flip?
State. A mitigation is price returning into a zone that has never broken, so the level is doing its original job. A flip is a retest of a zone that already broke, which means the level has changed sides and now acts against its original direction.
What does InpImpulseAtrMult 1.5 require?
The close has to move at least one and a half ATR readings away from the previous close, with the candle body pointing the same way. Anything smaller creates no zone. Raising it towards 2.5 leaves only the strongest moves, and lowering it towards 1.0 fills the chart.
Does a broken block get removed from the chart?
No. It gets stamped with a break time and stays visible with its colour changed to the breaker colour. That is deliberate, because a broken zone is often more useful afterwards than before, once price returns to it from the other side.
Why does InpLookbackBars matter for zone creation time?
So it can never react to bars that came before it existed. Every check compares the bar time against the zone creation time first, which stops the tool reporting mitigations on history that had already happened when the zone formed.
Are results guaranteed?
No. Trading involves risk. Results are not guaranteed; past performance is not indicative of future results. Use the Breaker Block and Order Block Indicator as one input. Always backtest before trading live.
Category: this is part of our Smart Money collection. Also, truly, browse more Smart Money for MetaTrader, or explore every MT4 indicator and MT5 indicator on the site.
External references
- The core method is documented in Block trade on Wikipedia.
- Additional market context is at Flag at Investopedia.

About the author
Written by Dominic Walsh, a Forex trader and MT4/MT5 indicator, Expert Advisor and script developer. Every tool on forexmt4systems.com is tested on live charts before release and ships with ready-to-use compiled MT4 (.ex4) and MT5 (.ex5) files. Learn more about the trader and developer behind this site.
How we build, test and correct every tool: Editorial & Testing Policy. Trading carries risk; see the disclaimer.