
Premium Discount Equilibrium is a premium discount indicator TradingView traders can use to stop buying at the top of a range. Also, it builds a dealing range from the last 60 bars, splits it at the 50% midpoint, and calls everything above that equilibrium premium and everything below it discount. Bias alone rarely times an entry, so the script waits for a 9 EMA reclaim inside the correct half.
It is free and open source. Indeed, you can add it to any chart from the Premium Discount Equilibrium script page on TradingView, and the full Pine source is published there for you to read.
What Premium Discount Equilibrium plots on the price chart
A thick grey line marks the equilibrium at the middle of the range. Still, thinner lines mark the range high in pink and the range low in teal. Two shaded bands show the optimal trade entry zones, one in the lower part of the range and one in the upper part. Thus, the background tints faintly while price sits in discount or premium. Entries print as triangles with the text PDE, backed by two wider glow layers. The signal bar changes colour. An eight-row dashboard reports zone, equilibrium, range, OTE state, the reclaim EMA, position and bars since the last signal.
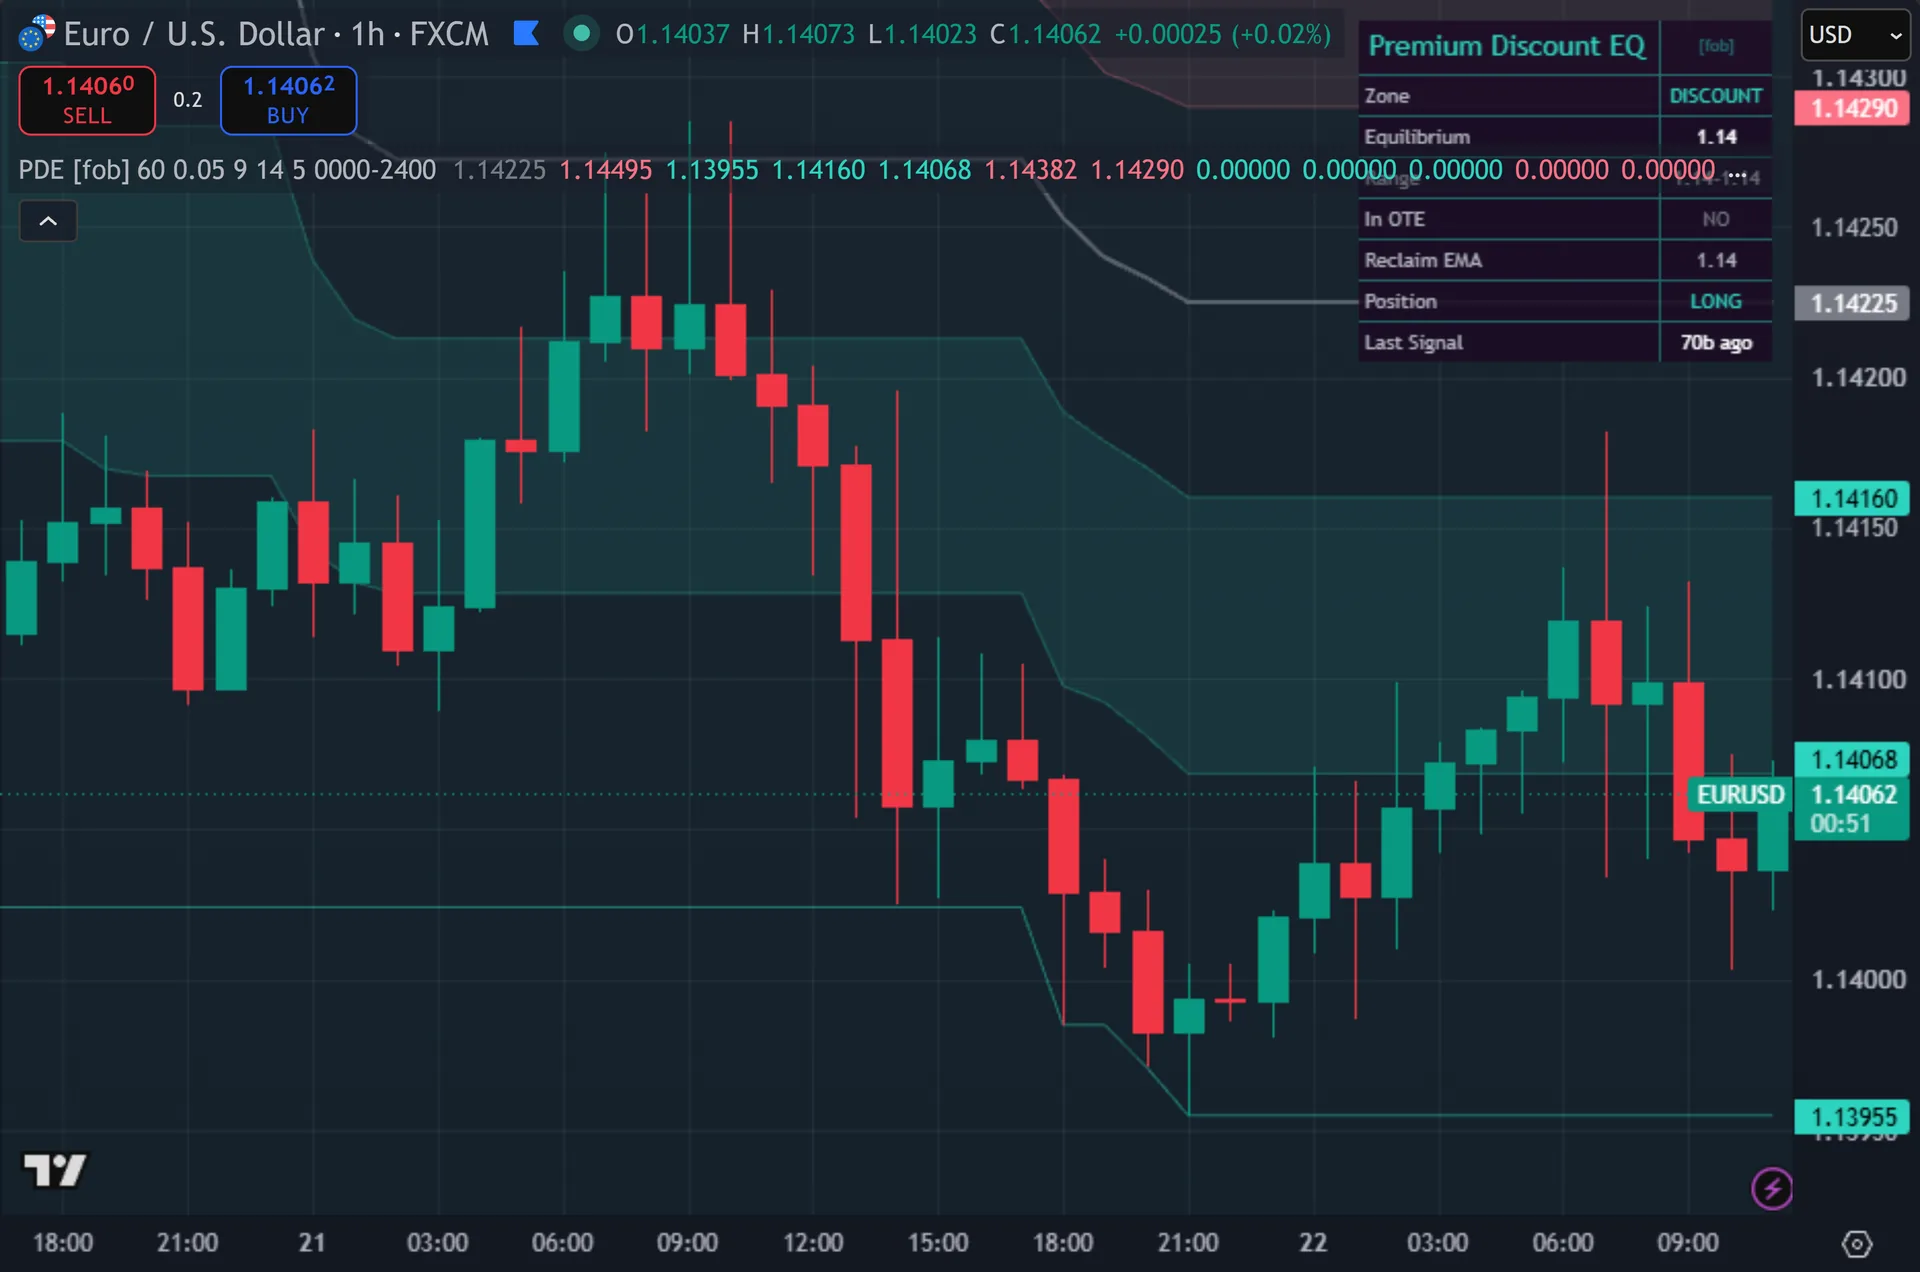
How Premium Discount Equilibrium is built
Building the range and the midpoint
The range comes from a rolling window. Hence, the script takes the highest high and the lowest low of the last 60 bars, which the Dealing Range Length input controls. Equilibrium is the plain average of those two levels. Next, nothing here is drawn by hand, so the range updates itself as the chart moves forward.
A neutral band sits around the midpoint. Then, EQ Buffer defaults to 0.05, meaning 5% of the total range height. Price must close above equilibrium plus that buffer to count as premium, or below equilibrium minus it to count as discount. Yet, inside the band the script reports EQUILIBRIUM and takes no side.
Be clear about what that rolling window means in practice. Truly, when an old swing high drops out of the last 60 bars, the range shrinks and equilibrium moves, even on a quiet bar. So the zone label can flip from discount to premium while price sits still. Plainly, longer windows make the level steadier.
The OTE band and the trigger
Two shaded bands mark the optimal trade entry zones. Also, the discount band runs from 21% to 38% of the range measured up from the low, which equals the 62% to 79% retracement measured down from the high. The premium band mirrors it below the range high. Indeed, both are display only until you switch Require OTE Zone on, and that toggle ships off.
The trigger is a simple reclaim. Still, a long needs price in discount and a close crossing above the 9-period EMA on that bar. A short needs price in premium and a close crossing below it. Thus, so the zone supplies the bias and the EMA cross supplies the timing.
Then the gates apply. Hence, the bar must close, since the code requires barstate.isconfirmed. At least 5 bars must have passed since the last signal. Next, buys and sells alternate through an internal position state. An optional session window can restrict signals to set hours, and it ships wide open at 0000 to 2400. Then, one input does nothing: the script computes a 14-period ATR but never feeds it into any condition, so leave ATR Length alone.
How to read the signals
Use the zone as a location filter. Yet, the point of the model is straightforward: look for longs while price trades in the lower half of the range and shorts while it trades in the upper half. The background tint gives you that read at a glance, and the dashboard names it in words.
Treat the triangle as the timing element, not the thesis. Truly, a PDE triangle means price was already in the favourable half and then reclaimed the 9 EMA on a closed bar. It says nothing about the trend on a higher timeframe, because the script reads only the chart you have open.
The OTE band adds selectivity. Plainly, price inside the discount band sits deep in the lower third of the range, which is where the model expects the better entries. Turn Require OTE Zone on and the script waits for that, which cuts signal count sharply. Also, leave it off and the band stays informational.
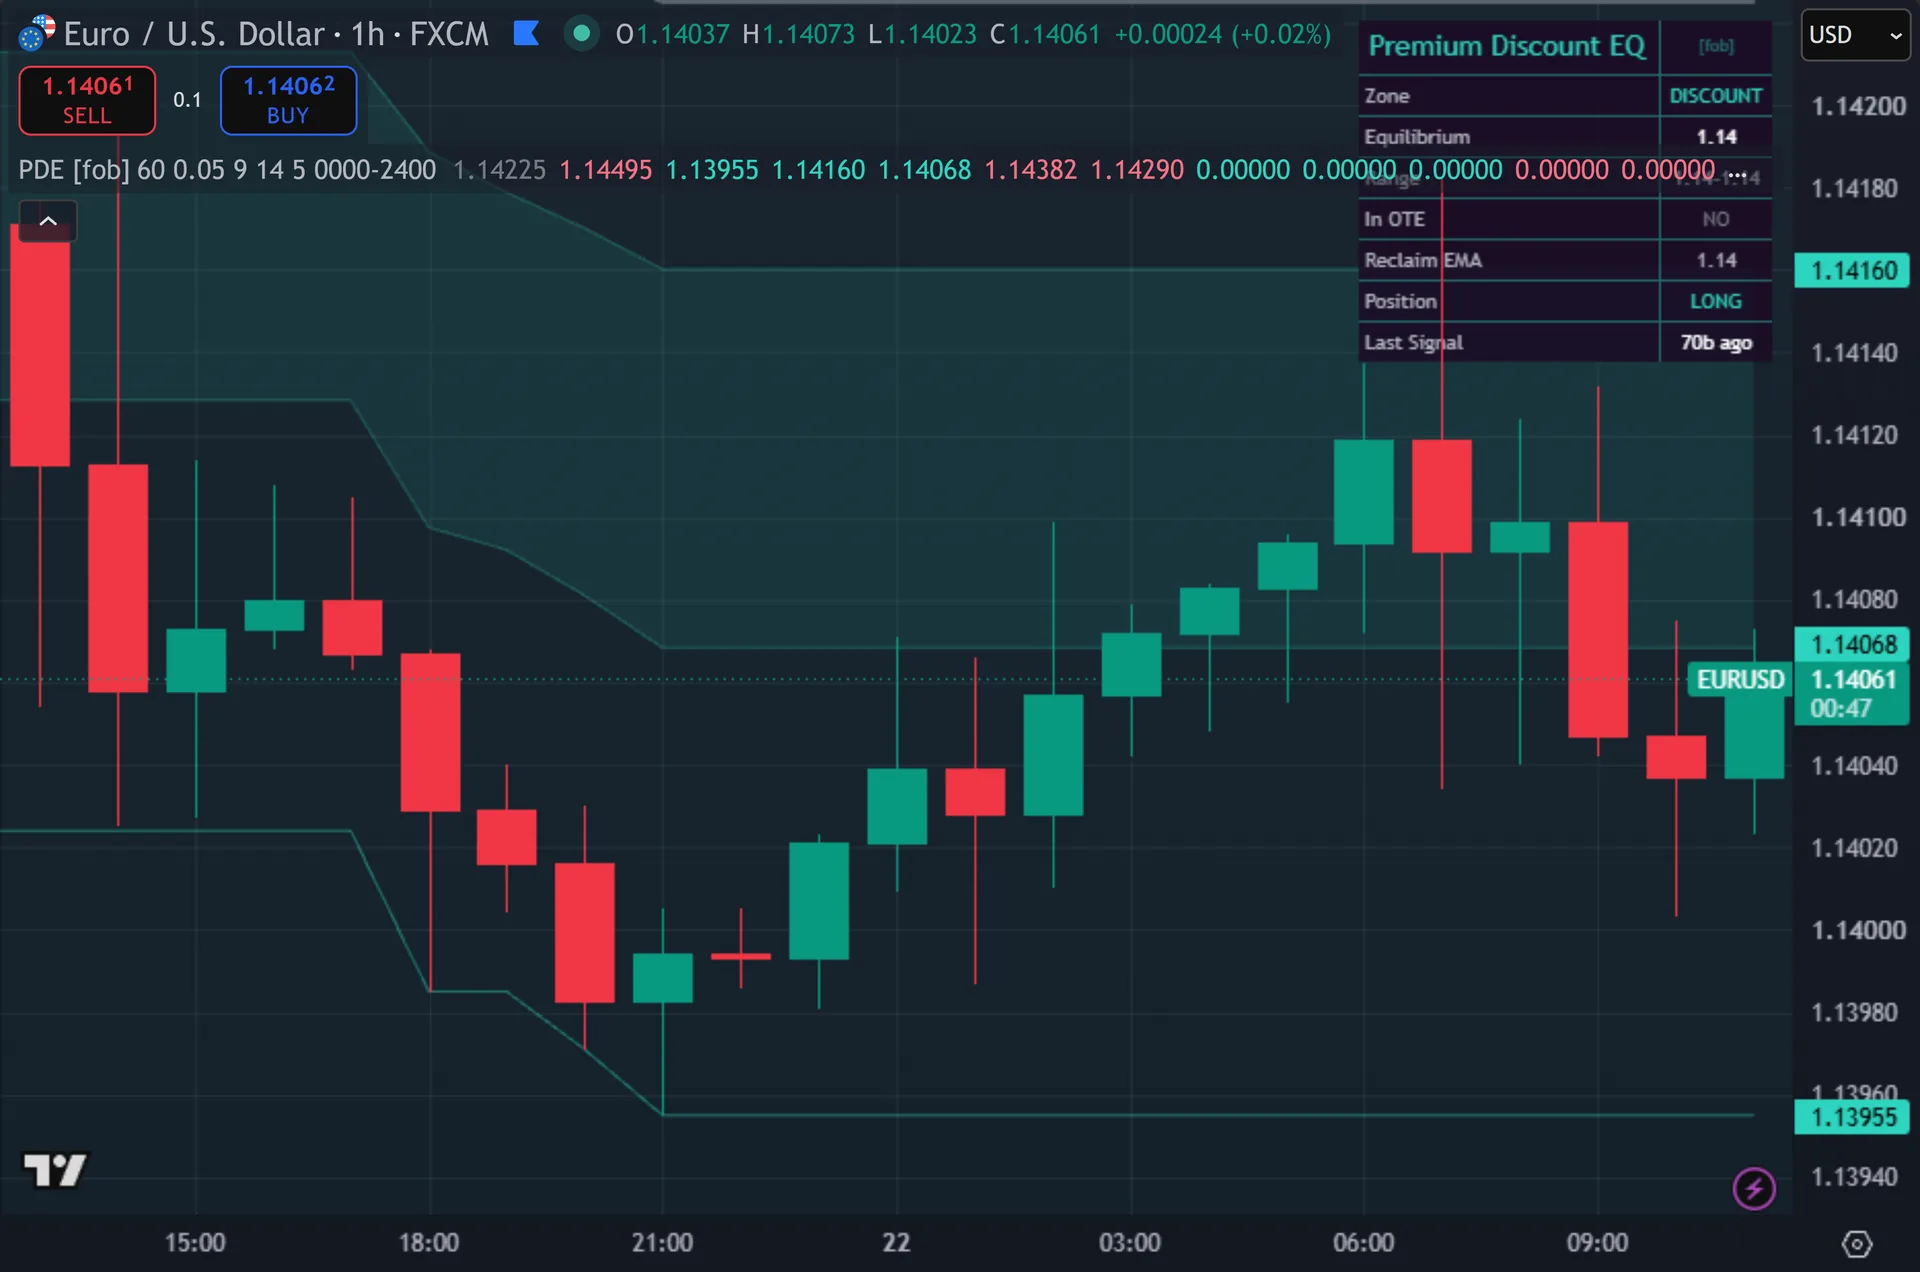
Every Premium Discount Equilibrium setting explained
The script exposes 15 inputs, grouped in the settings panel exactly as shown below. Defaults are the published values.
Range
| Setting | What it does | Default | Range |
|---|---|---|---|
| Dealing Range Length | Bars used to build the high/low dealing range. | 60 | 10 to 300 |
| EQ Buffer (frac of range) | Neutral band around EQ where no bias applies. | 0.05 | 0.0 to 0.3 |
| Reclaim EMA Length | Sets the reclaim ema length used in the calculation. | 9 | 2 to 50 |
| Show OTE 62-79 Band | Optimal Trade Entry zone inside discount/premium. | on | on / off |
| ATR Length | Sets the atr length used in the calculation. | 14 | 5 to 50 |
Signal Logic
| Setting | What it does | Default | Range |
|---|---|---|---|
| Cooldown Bars | Sets the cooldown bars used in the calculation. | 5 | 1 to 40 |
Filters
| Setting | What it does | Default | Range |
|---|---|---|---|
| Restrict to Session | Toggles restrict to session on the chart. | off | on / off |
| Session Window | Controls session window. | 0000-2400 | |
| Require OTE Zone | Only fire when price is inside the OTE band. | off | on / off |
Visual
| Setting | What it does | Default | Range |
|---|---|---|---|
| Show Zones | Toggles show zones on the chart. | on | on / off |
| Show Dashboard | Toggles show dashboard on the chart. | on | on / off |
| Show 3-Layer Glow | Toggles show 3-layer glow on the chart. | on | on / off |
| Buy Color | Colour used for buy color. | #2dd4bf | |
| Sell Color | Colour used for sell color. | #fb7185 | |
| Dashboard BG | Colour used for dashboard bg. | color.new(#1a0a24, 16) |
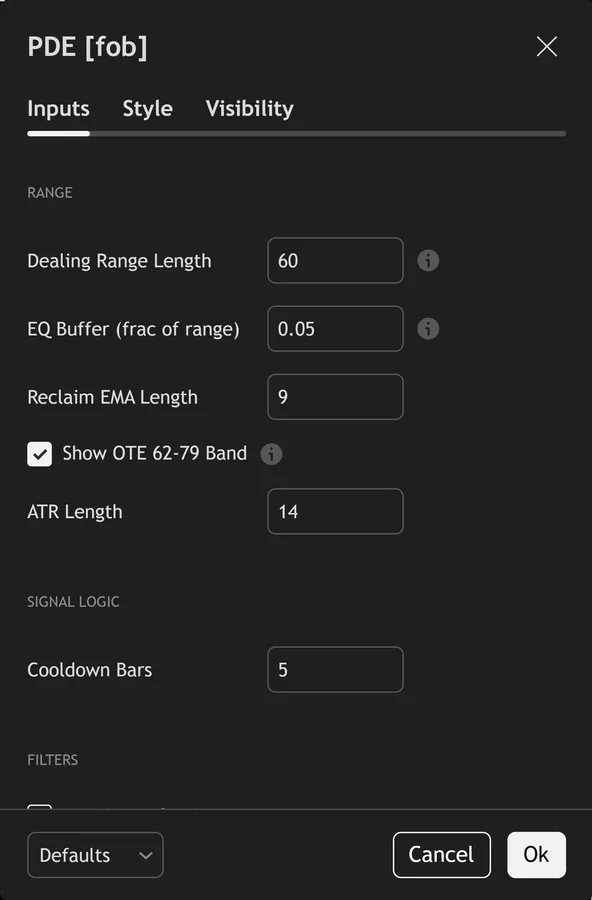
Alerts built into Premium Discount Equilibrium
The script ships 15 alert conditions. Indeed, open the alert dialog on the chart, pick the indicator as the condition source, then choose the event you want. Alerts fire on the close of the bar, so they follow the same confirmed-bar rule the on-chart signals use.
- PDE Buy
- PDE Sell
- PDE Any Signal
- PDE Enter Premium
- PDE Enter Discount
- PDE Discount OTE
- PDE Premium OTE
- PDE EQ Cross
- PDE EMA Up
- PDE EMA Down
- PDE Range High
- PDE Range Low
Other markets and timeframes
Every level derives from the measured range itself. Still, the buffer is a fraction of range height, the OTE edges are fractions of the same range, and the trigger is an EMA cross. No pip value, no fixed point distance and no volume enters the calculation. Thus, the defaults therefore move to indices, gold, crypto and equities without retuning. Dealing Range Length is the input to revisit per market and timeframe, since 60 bars covers a very different span on M5 than on the daily.
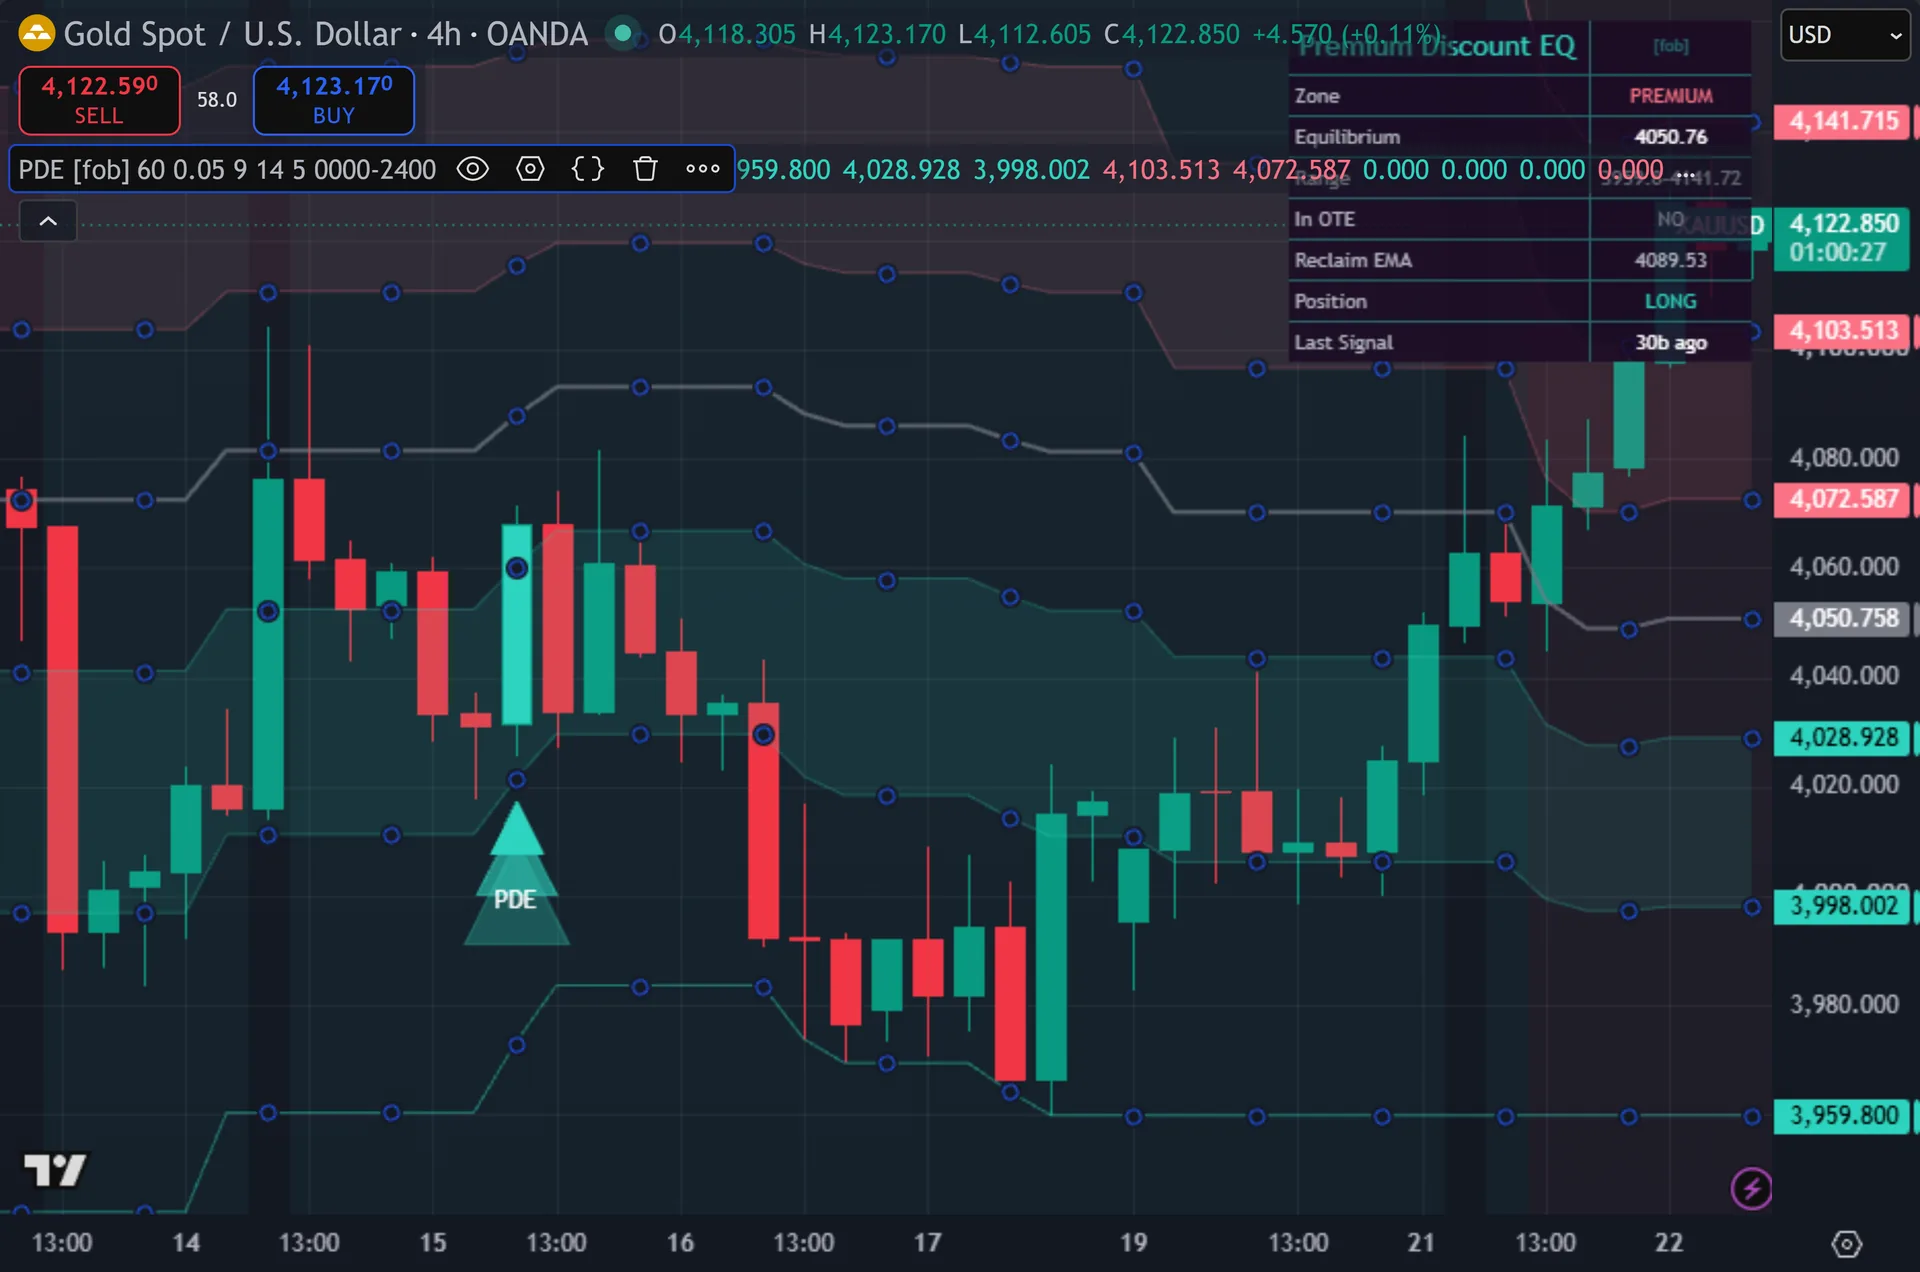
Limitations worth knowing
The range is a rolling Donchian window, not a hand-drawn dealing range between two chosen swings. Hence, purists draw the range from a specific impulse leg. This script cannot know which leg you mean, so it uses the last 60 bars instead. Next, equilibrium and the OTE bands inherit that difference.
It fades strength by design. In a strong uptrend price parks in premium, and the script keeps offering short triggers on every EMA crossunder. Nothing in the code checks trend, structure, order blocks or fair value gaps, despite the vocabulary the model borrows. Then, it also holds no stop, target or sizing logic.
Signals alternate and pause. Yet, the internal position state blocks a second long before a short appears, and the 5-bar cooldown suppresses anything that follows too closely. Leaving Require OTE Zone off means most triggers fire anywhere in the favourable half, not only in the deeper part of it.
Get Premium Discount Equilibrium on TradingView
Open Premium Discount Equilibrium on TradingView
If you also trade MetaTrader, the MT4 and MT5 indicator library is available below.
Get the complete indicator library
One email unlocks the full MT4 and MT5 indicator library. Truly, this TradingView script stays free on TradingView – the button above adds it to your chart.
Using it alongside MetaTrader
Adding a script on TradingView takes one click, so there is no install step here. Plainly, if you want the same idea on MetaTrader, the MT4 and MT5 indicator installation guide walks through copying files into the data folder and attaching them to a chart. You can also browse the full MetaTrader indicator library, the MT4 indicators section, or the other free TradingView scripts published on this profile. For related chart tools see the MT5 indicators section and the forex trading strategies guides.
External references
- Price action trading on Wikipedia
- Liquidity at Investopedia
- Support and Resistance at StockCharts ChartSchool
Frequently asked questions
Does Premium Discount Equilibrium repaint?
Signals require barstate.isconfirmed, so a triangle prints on a closed bar and stays there. The range lines behave differently. Equilibrium, the range high and the range low recalculate as the 60-bar window rolls forward, so those levels drift over time by design.
What does the OTE band represent?
It marks the 62% to 79% retracement area of the current range. In code terms the discount band runs from 21% to 38% of range height above the low, and the premium band mirrors it under the high. It stays visual until you enable Require OTE Zone.
Why is there no signal while price sits in discount?
Discount alone does not trigger anything. Also, price also has to cross the 9 EMA on a closed bar, the 5-bar cooldown must have elapsed, and the previous signal must not already be a long. If you enabled Require OTE Zone, price must also sit inside the discount band.
Does it read a higher timeframe?
No. Indeed, the script makes no external timeframe request, so the range, the equilibrium and the EMA all come from the chart in front of you. Load it on a higher timeframe chart if you want a higher timeframe range.
How much should I rely on this indicator?
Treat it as one input, not a decision. Still, it is a chart analysis tool, not trading advice. Test it on your own markets and timeframes before relying on it. Results are not guaranteed; past performance is not indicative of future results.

About the author
Written by Dominic Walsh, a Forex trader and MT4/MT5 indicator, Expert Advisor and script developer. Every tool on forexmt4systems.com is tested on live charts before release and ships with ready-to-use compiled MT4 (.ex4) and MT5 (.ex5) files. Learn more about the trader and developer behind this site.
How we build, test and correct every tool: Editorial & Testing Policy. Trading carries risk; see the disclaimer.