
The non repainting buy sell indicator plots BUY and SELL arrows on a closed EURUSD H1 bar. It only fires once four checks agree. Those are Heiken Ashi color, an EMA trend filter, an RSI cross, and a tick volume push. Traders who want fewer, filtered arrows instead of constant noise get the most from this stack.
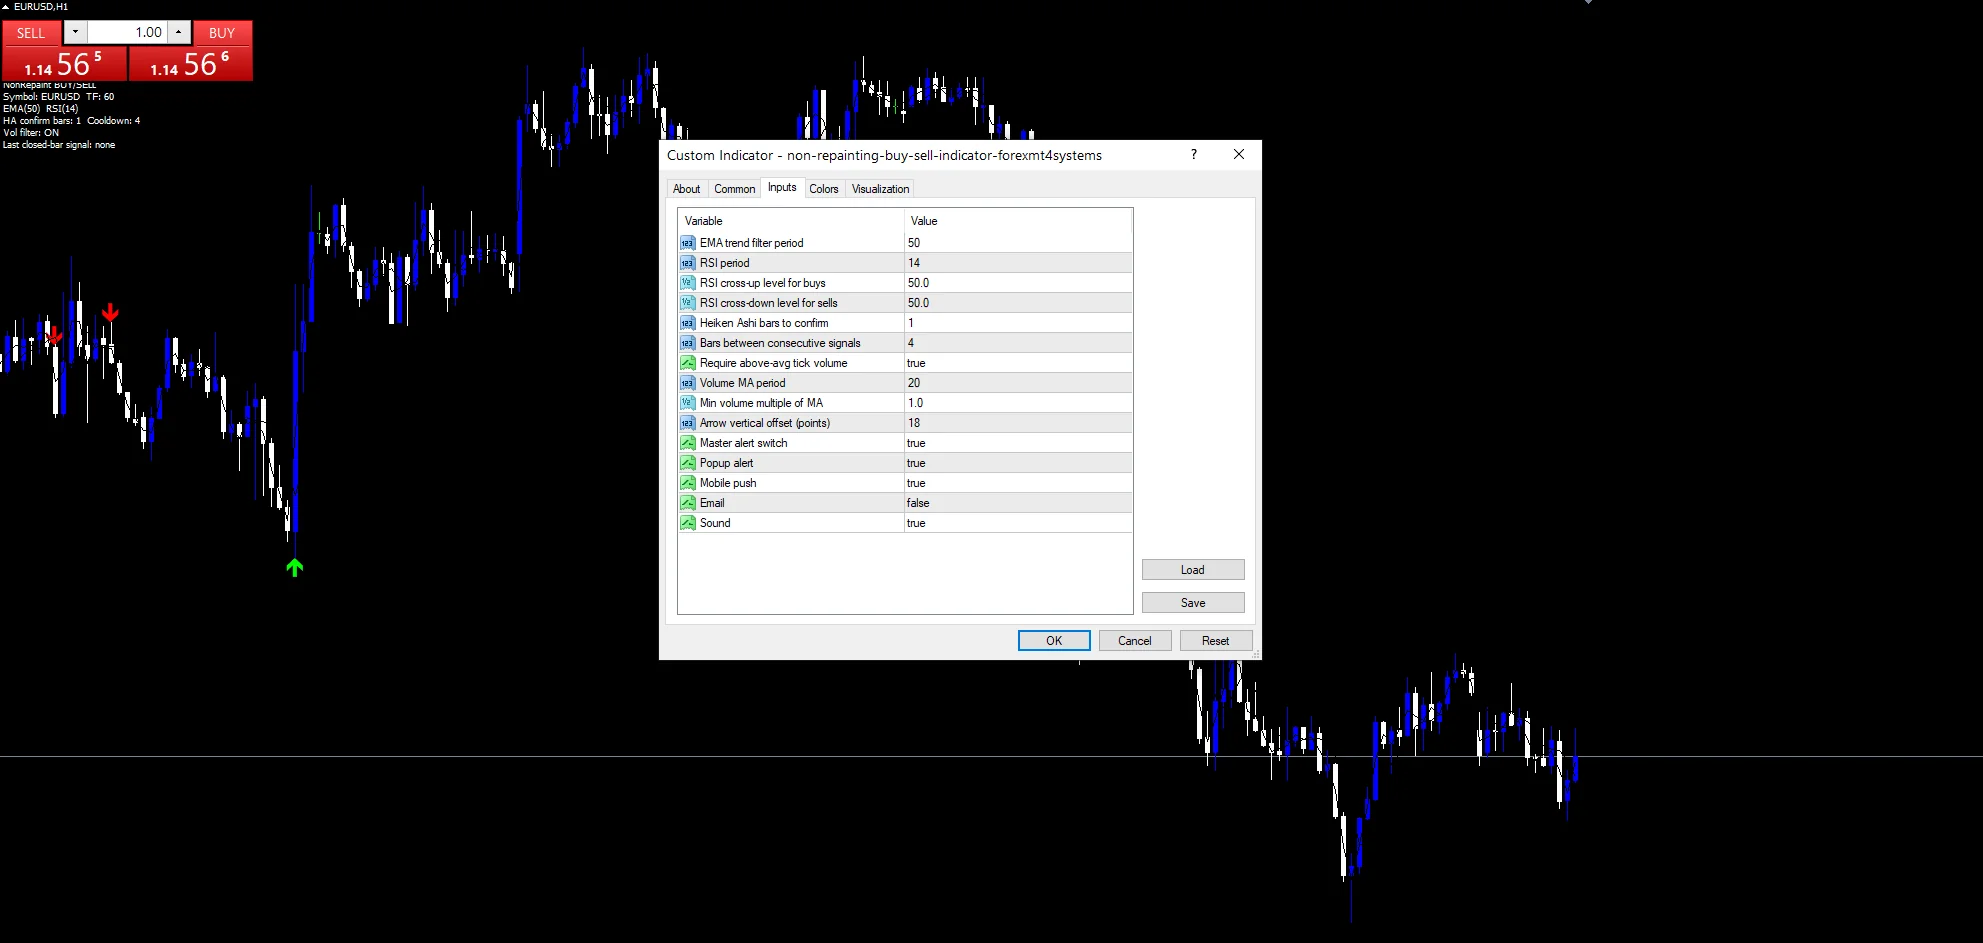
This build ships as a compiled .ex4 for MT4 and .ex5 for MT5; the screenshots below come from EURUSD H1.
| Platforms | MT4 (.ex4) + MT5 (.ex5) |
|---|---|
| Chart window | Main price chart |
| Plots | 2: BUY, SELL |
| Alerts | popup, push notification, email, sound |
| Inputs | 15 |
What it puts in front of you
BUY (lime, code 233) sits below the bar’s low. It only appears once every filter agrees on a bullish read.
SELL (red, code 234) sits above the bar’s high. It only appears once every filter agrees on a bearish read.
- BUY: arrow, lime, width 2, arrow code 233
- SELL: arrow, red, width 2, arrow code 234

How the values come out
Heiken Ashi color confirmation
The code rebuilds Heiken Ashi values first. It uses the real open, high, low and close of every bar. The smoothed close buffer averages the four raw prices.
The smoothed open buffer averages the prior Heiken Ashi open and close. Each smoothed candle carries a memory of the one before it. A bullish setup needs HaConfirmBars closed candles where the smoothed close sits above the smoothed open. A bearish setup needs the same count on the other side. HaConfirmBars defaults to 1.
EMA trend filter and the RSI cross
EmaPeriod feeds an EMA call, averaging the last 50 closes by default. Price must close above that average for a buy, and below it for a sell. The arrow only fires with the trend.
RsiPeriod drives an RSI reading on the current bar and the one before it. A buy needs RSI to cross up through RsiBuyLevel. A sell needs it to cross down through RsiSellLevel. Both levels default to 50.0.
Volume push and the cooldown
When UseVolumeFilter stays on, the code averages tick volume over the last VolMaPeriod bars. It then checks that the current bar clears VolMult times that average. VolMaPeriod defaults to 20 and VolMult defaults to 1.0.
CooldownBars then blocks a fresh arrow until that many bars pass since the last one. A single strong swing cannot fire five arrows in a row. Four bars is the default gap.
How to read the pane
A lime BUY arrow needs four things on one closed bar. Heiken Ashi turns bullish, price closes above the EMA, RSI crosses up through 50, and volume clears its filter.
A red SELL arrow flips every one of those checks. Bearish Heiken Ashi, price under the EMA, RSI crossing down through 50, and a volume confirmation, all together.
The scan skips the still-forming bar. An arrow only appears once its bar has closed, so it will not move or vanish later.
Alert channels in this build: popup, push notification, email and sound, one message per closed bar.
Alerts cover popup, push, email and sound together. EnableAlerts fires once per closed bar using the time[1] guard, so a flood of mid-bar alerts cannot happen.
Every Non repainting buy sell Indicator input
Core settings
| Setting | What it does | Default |
|---|---|---|
EmaPeriod |
EMA trend filter period. EmaPeriod sets the EMA trend filter length. It defaults to 50. A shorter value reacts faster but tags more counter-trend noise. | 50 |
RsiPeriod |
RSI period. RsiPeriod sets the RSI lookback behind the midline cross. It defaults to 14, matching Wilder’s classic setting. | 14 |
RsiBuyLevel |
RSI cross-up level for buys. RsiBuyLevel is the level RSI must cross up through for a buy. It defaults to 50.0. | 50.0 |
RsiSellLevel |
RSI cross-down level for sells. RsiSellLevel mirrors RsiBuyLevel on the sell side. It also defaults to 50.0. | 50.0 |
HaConfirmBars |
Heiken Ashi bars to confirm. HaConfirmBars sets how many closed Heiken Ashi candles must agree on color before a signal counts. It defaults to 1. | 1 |
CooldownBars |
Bars between consecutive signals. CooldownBars spaces signals apart. Its default of 4 bars stops the indicator from stacking arrows during one strong swing. | 4 |
UseVolumeFilter |
Require above-avg tick volume. UseVolumeFilter turns the tick volume check on or off. It defaults to true. | on |
VolMaPeriod |
Volume MA period. VolMaPeriod sets the tick volume average window. It defaults to 20 bars. | 20 |
VolMult |
Min volume multiple of MA. VolMult is the minimum multiple of that average a bar must clear. It defaults to 1.0. | 1.0 |
Display settings
| Setting | What it does | Default |
|---|---|---|
ArrowOffsetPts |
Arrow vertical offset (points). ArrowOffsetPts is a cosmetic point offset, defaulting to 18, that keeps arrows clear of the candle wicks. | 18 |
Alert settings
| Setting | What it does | Default |
|---|---|---|
EnableAlerts |
Master alert switch. | on |
EnablePopup |
Popup alert. | on |
EnablePushNotify |
Mobile push. | on |
EnableEmail |
Email. | off |
EnableSound |
Sound. | on |
Picking a chart for it
The screenshot runs on EURUSD H1. The default filter lengths line up well with that pace. Four checks must agree at once, so lower timeframes tend to produce fewer signals than a single moving-average cross would. That suits traders who trade less often but want a cleaner read. The same logic also runs on other forex majors and higher timeframes without any rebuild.
Known limits
In a ranging market the EMA trend filter and the RSI midline cross often disagree. The indicator can sit quiet for long stretches even while price swings inside a range.
Tick volume counts price changes, not real traded volume. The VolMult filter can pass or block a bar for reasons that have nothing to do with actual participation.
Four conditions must line up on one closed bar. A genuine reversal that satisfies only three of them prints no arrow at all, so some real turns get skipped.
Copy the compiled Non repainting buy sell Indicator file into your MQL4/Indicators folder, and the MT5 build into MQL5/Indicators, then restart the terminal and drag it onto a chart. The step-by-step guide with screenshots is at how to install MT4 and MT5 indicators.
Background reading on the method behind the Non repainting buy sell Indicator: Trade finance technology on Wikipedia, Doji at Investopedia.
Download the Non repainting buy sell Indicator for MT4 and MT5
The zip holds the compiled Non repainting buy sell Indicator build for MT4 and MT5, plus a short README. Compiled files only, no source. Enter your email below and the download link arrives in your inbox.
Download this indicator free
Enter your email and the file is yours. You also get the full MT4 and MT5 library.
FAQ
Why does the BUY arrow need both an EMA filter and an RSI cross?
The BUY arrow only plots when price closes above the EmaPeriod average, with RSI crossing up through RsiBuyLevel on the same closed bar. Pairing the two filters cuts down on RSI crosses that fire against the wider trend. It also filters out EMA closes with no real momentum behind them. Heiken Ashi color and the volume check still have to agree too.
What does HaConfirmBars actually control?
HaConfirmBars sets how many closed Heiken Ashi candles in a row must share the same color. The default is 1, so a single smoothed candle already counts. Raising it to 2 or 3 demands a longer streak. That cuts noise but delays every signal by that many extra bars.
Does UseVolumeFilter read real traded volume?
No. UseVolumeFilter compares tick volume, the count of price changes MetaTrader records per bar, against a VolMaPeriod rolling average times VolMult. It works as a proxy for activity, not a broker feed of real traded size. A quiet session with wide spreads can still clear the filter.
How does CooldownBars change signal spacing?
CooldownBars stops the indicator from stacking BUY or SELL arrows too close together. The default is 4 bars. Once an arrow prints, the code will not print another until at least 4 bars pass, even if every filter lines up again sooner.
Are results guaranteed?
No. Trading involves risk. Results are not guaranteed; past performance is not indicative of future results. Use the Non repainting buy sell Indicator as one input. Always backtest before trading live.
Category: this is part of our Signal and Forecast collection. Browse more Signal and Forecast for MetaTrader, or explore every MT4 indicator and MT5 indicator on the site.
External references
- Learn more about the underlying method in Trade finance technology on Wikipedia.
- For wider market background, see Doji at Investopedia.

About the author
Written by Dominic Walsh, a Forex trader and MT4/MT5 indicator, Expert Advisor and script developer. Every tool on forexmt4systems.com is tested on live charts before release and ships with ready-to-use compiled MT4 (.ex4) and MT5 (.ex5) files. Learn more about the trader and developer behind this site.
How we build, test and correct every tool: Editorial & Testing Policy. Trading carries risk; see the disclaimer.