
Learning what is risk management in forex is the difference between a trader who lasts and one who blows an account in a month. It is the set of rules that decides how much you can lose before you ever think about how much you can win.
This guide explains what is risk management in forex in plain beginner terms. You will see the core pillars, follow worked numbers on real pairs, and leave with a simple routine you can run before every trade.
What Is Risk Management in Forex, Defined
Risk management is the practice of controlling how much money each trade can cost you. It works before profit ever enters the picture, because survival comes first and gains come second.
Think of it as the seatbelt of trading. A good strategy still crashes without one, while a modest strategy protected by careful limits keeps driving. So the rules you set around a trade often matter more than the trade idea itself.
The mindset shift is small but powerful. You stop asking how much a trade could make, and start asking how much it could lose. Because the loss is capped first, every position begins on a base of protection rather than hope.
This is why professionals obsess over defense. A single reckless trade can undo months of steady work, yet a disciplined loss barely dents the account. So the whole craft rests on keeping each loss small and each recovery easy.
Why Beginners Skip It
New traders chase entries and ignore exits, which feels natural but ends badly. The excitement lives in the profit, so the loss gets little thought. Because of that gap, many accounts grow for weeks and then vanish in a day.
The fix is to flip the order of your questions. Decide the loss first, then judge whether the reward is worth it. So risk management is less a tool than a habit of thinking that shapes every decision you make.
This habit also calms the mind while you trade. When the worst case is known and small, a losing trade stops feeling like a threat. Because the fear fades, your decisions grow clearer, and clear decisions tend to be better ones.
The Pillars of Risk Management
Risk management is not one rule but a small set that works together. Each pillar guards a different weakness, and together they form a frame around every trade.
- Risk a fixed small percent. Cap the loss on any single trade at a low share of the balance, often one or two percent.
- Place a stop on every trade. Set the exit that ends a losing trade before you enter, never after.
- Size the lot to the stop. Choose the position size that keeps the dollar risk fixed, whatever the stop distance.
- Aim for reward above risk. Target a profit larger than the amount risked, so wins outweigh losses over time.
- Cap total open risk. Add up the risk across all live trades, and keep the sum inside a sensible limit.
- Control drawdown. Watch the peak-to-trough dip in the account, and slow down when it grows.
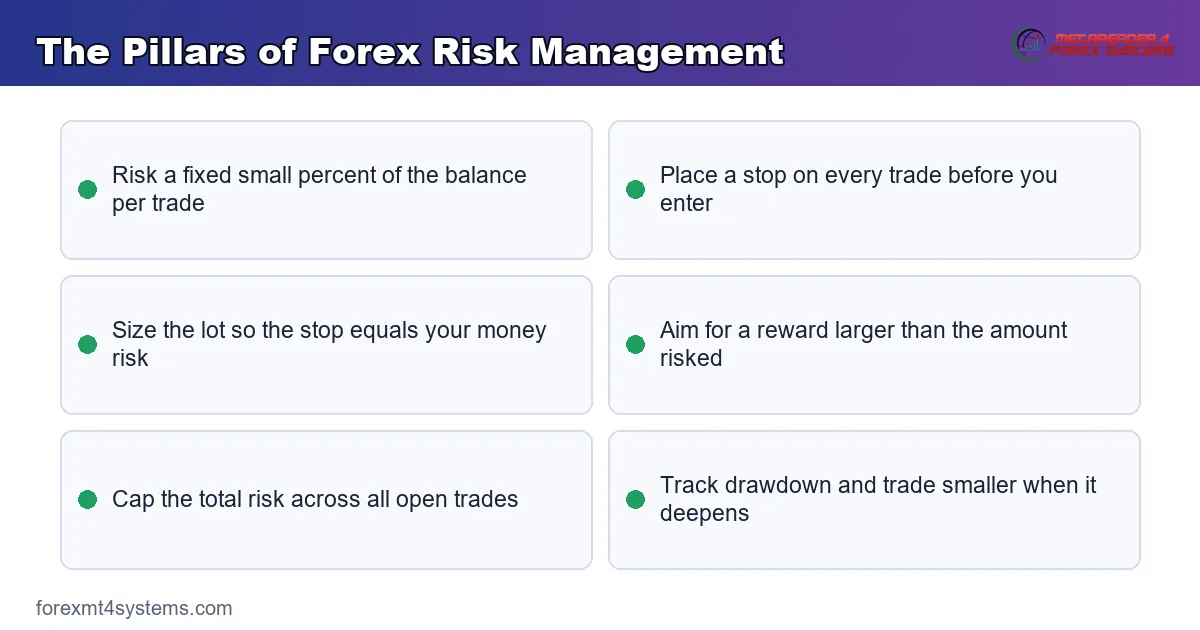
Get these six working, and the account gains a kind of armor. No single trade can break it, and no short losing streak can end it. So the pillars turn trading from a gamble into a business with known, bounded costs.
How the Pillars Connect
The pillars are not separate boxes; they lean on one another. Your risk percent sets the money at stake, and the stop sets the distance, so together they fix the lot. Because each depends on the next, skipping one weakens them all.
Reward and drawdown then close the loop. A steady reward-to-risk ratio lets wins cover losses, while a drawdown limit keeps a bad run from turning fatal. So the six pillars form a chain, and a chain is only as strong as its weakest link.
How Risk Management Works in Practice
Numbers turn theory into habit, so walk through a full trade. You hold a five thousand dollar account, and you follow a one percent risk rule.
First, set the risk in money. One percent of five thousand is fifty dollars, so a losing trade may cost fifty. That figure is the ceiling every later step protects.
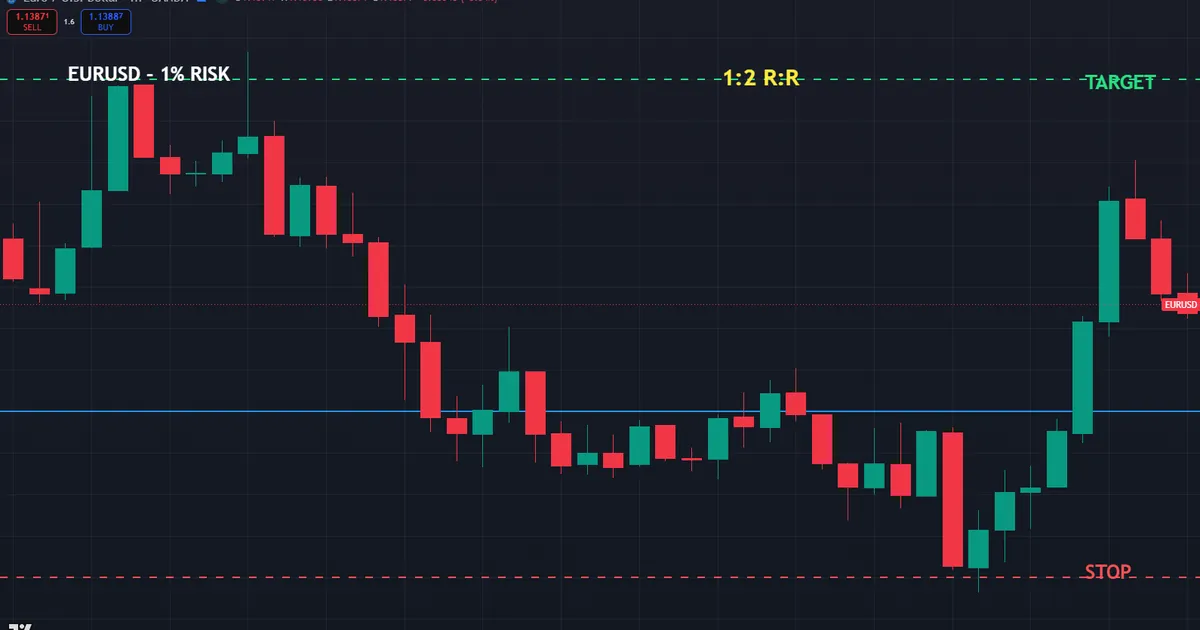
Next, read the stop. Your chart on EURUSD near 1.14 places a sensible stop fifty pips from the entry. So the trade risks fifty dollars spread across a fifty pip move against you.
Sizing and Targeting the Trade
Now size the lot to the stop. Divide the fifty dollar risk by the fifty pip stop, and you need one dollar a pip. On a dollar pair that points to a 0.10 lot, which our position size calculator confirms in one entry.
Then set the target above the risk. If the stop sits fifty pips away, place the target one hundred pips out for a one-to-two ratio. So you risk fifty dollars to earn one hundred, which lets you lose often and still come out ahead.
Check the logic once. At 0.10 lots the pip value is one dollar, and fifty pips at one dollar is fifty dollars. The numbers close the loop, which tells you the size fits the plan.
Why the Loss Comes First
Notice the order of the steps above. The risk in money led, the stop followed, and the lot came last. Because you fixed the loss before the size, the trade could never cost more than fifty dollars.
Reverse that order, and the danger returns. Pick a lot first, and the loss becomes whatever the market decides. So the sequence itself is a rule, not just a habit of tidy bookkeeping.
A Second Worked Example
Repeat the routine on a different pair for contrast. You hold the same account, yet the chart on GBPUSD near 1.34 asks for a tighter stop.
Set the risk first. One percent of five thousand is still fifty dollars, so the loss ceiling has not moved. Your stop this time sits only twenty pips from the entry, closer than before.
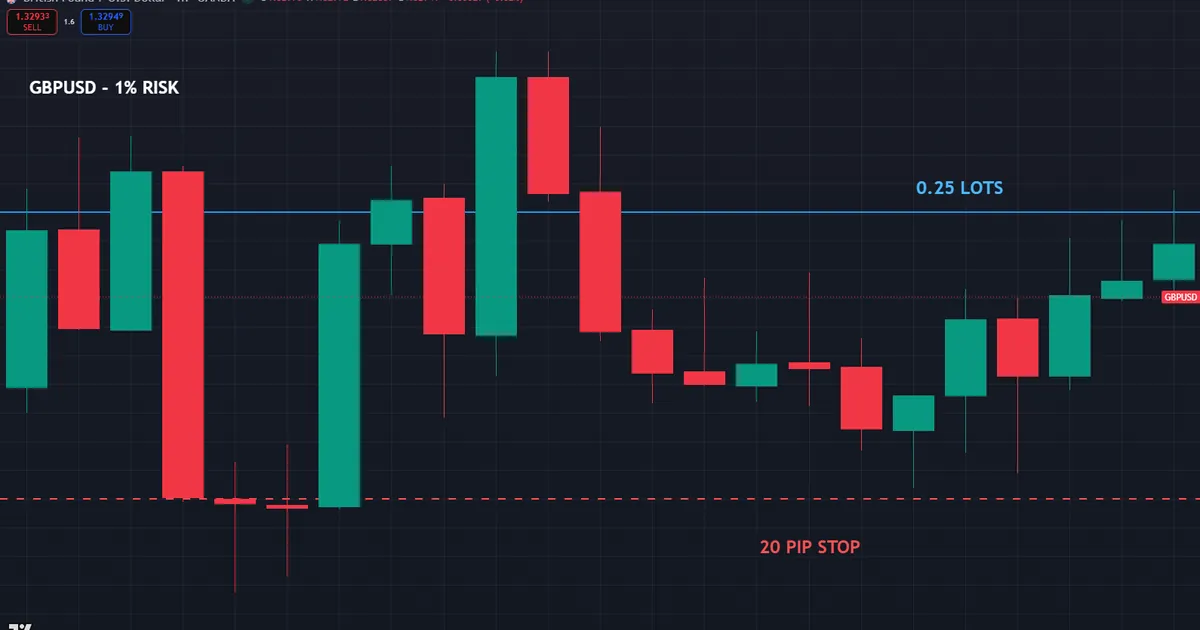
Now run the size. Divide the fifty dollar risk by the twenty pip stop, and you need two and a half dollars a pip. That points to a 0.25 lot, larger than the last trade because the stop is tighter.
Notice what held and what changed. The risk stayed at fifty dollars, yet the lot grew as the stop shrank. So the position size flexed to protect the same figure, which is exactly the point of the method.
Reading the Reward Side
The tighter stop also reshapes the target. Twenty pips of risk paired with a forty pip target still gives a one-to-two ratio. So you keep the same reward math even as the pair and the distance change.
This is why the ratio travels so well. It measures reward against risk in the same units, whatever the pair. Because it ignores the raw pip count, it lets you compare very different trades on one honest scale.
Download the complete indicator database
Put these concepts on your charts. One email unlocks the full library of 1,380+ indicators with compiled MT4 and MT5 files, plus my TradingView scripts. No paywall, no spam, unsubscribe any time.
Get free access to my indicator database
One email unlocks 1,380+ free MT4, MT5 and TradingView indicators — the complete library. No single-tool download; you get the whole database.
Managing Risk Across Many Trades
One trade is easy to control, yet a full book needs a second layer. When several positions run at once, their risks add up into a single number that matters more than any one trade.
This total is often called portfolio heat. It is simply the sum of the money at risk across every open trade. So four trades at one percent each put four percent of the account on the line at the same moment.
The danger hides in correlation. Two longs on euro pairs tend to rise and fall together, so they act like one larger bet. Because they move as a pair, sizing each alone quietly understates the real exposure you carry.
Setting a Total Risk Cap
The fix is a ceiling on combined risk, not just single-trade risk. Many traders cap the total near five or six percent of the balance. So once the open risk reaches that line, they stop adding trades until one closes.
This cap also guides which trades to keep. When two ideas overlap heavily, you pick the stronger one rather than run both. Because the budget is finite, the discipline forces you to trade your best setups instead of every setup. Our portfolio heat calculator adds the open risk for you.
The cap works best when you count risk at entry, not at profit. A trade in profit with the stop moved to breakeven no longer risks fresh money. So free up room in the budget once a stop reaches the entry, and let a new idea take that space.
The One Percent Rule and Survival
The single most quoted rule in trading is to risk about one percent per trade. It sounds almost too small, yet the math behind it is what keeps accounts alive through rough patches.
Consider a losing streak, which every trader meets. Ten straight losses at one percent each leave more than eighty percent of the account intact. So the streak stings, but it never threatens the ability to keep trading.
Now raise the risk to ten percent and repeat. Ten straight losses at that size wipe out most of the balance. Because each loss is large, a normal run of bad luck becomes a fatal event rather than a passing dip.
Why Small Losses Recover Faster
Small losses matter because recoveries are not linear. Lose ten percent, and you need about eleven percent to get back. Lose fifty percent, and you need a full one hundred percent gain to return to even.
The gap widens fast as losses grow. So a low risk per trade does more than limit one bad day; it keeps the recovery within easy reach. Because the climb back stays gentle, your edge has time to work.
This is the quiet power of small position sizes. A shallow dip barely interrupts your progress, while a deep one can end it. So the trader who risks less often finishes ahead of the one who swings for more.
Where to Place the Stop
A stop is only useful when it sits in a sensible spot. Place it too close, and normal noise knocks you out. Place it too far, and the loss grows beyond the plan.
The better approach ties the stop to the chart, not to a round number. Put it beyond a level the market would need to break to prove you wrong. So the stop marks the point where the trade idea itself has failed.
Only after the stop has a home do you size the trade. Because the distance now reflects real structure, the lot that follows carries a meaningful risk. So chart-based stops and careful sizing always work as a pair. To picture the loss before you commit, our trade risk visualizer maps the stop and target on a chart.
Common Risk Management Mistakes
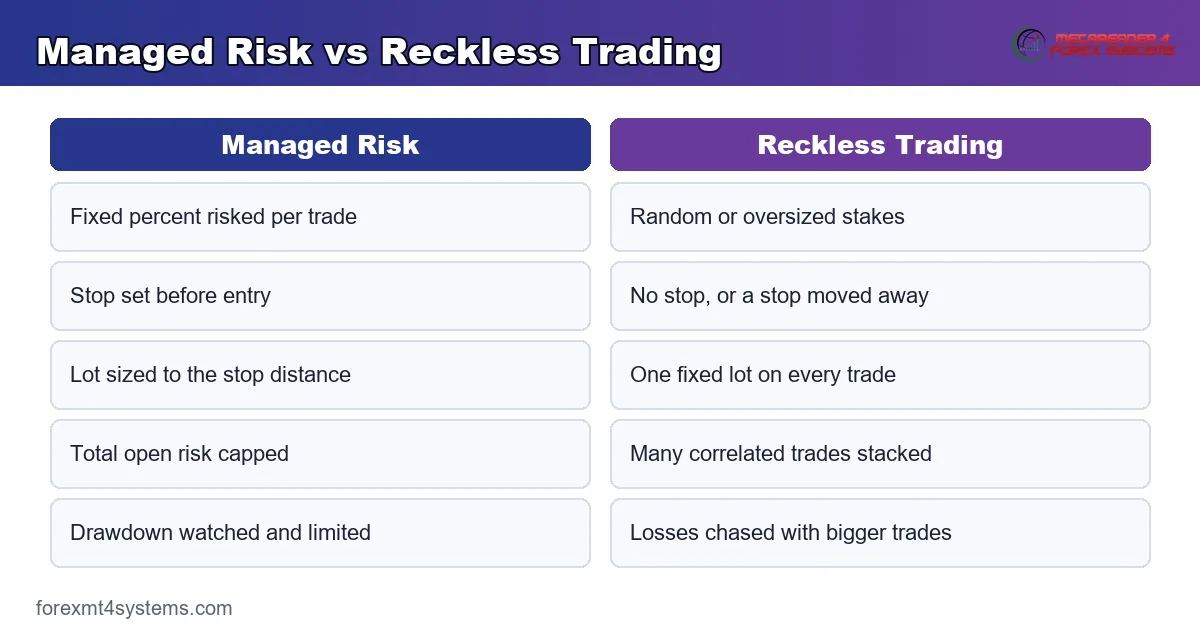
The rules are short, yet the same slips repeat across new accounts. Most come from letting emotion override a limit, and the fixes sit under the graphic below.
Trading Without a Stop
The classic error is entering with no exit for a losing trade. Without a stop the loss has no floor, so one bad move can swallow the account. Set the stop before you enter, and treat it as part of the entry itself.
Risking Too Much per Trade
A large risk percent turns a normal losing streak into deep damage. Five losses at ten percent each cut an account roughly in half. So keep the risk small, often one or two percent, and let the math absorb the streaks.
Moving the Stop to Avoid a Loss
Many traders slide the stop away as price nears it, hoping for a bounce. That habit turns a small planned loss into a large unplanned one. So fix the stop before entry, and let it do its job without interference.
Ignoring Total Open Risk
One percent on each of six trades can mean six percent at once. Sizing each alone hides that stacked exposure. So add up the risk across all live trades, and cap the total before you open another.
Chasing Losses With Bigger Trades
After a loss the urge to win it back fast is strong. Doubling the size to recover only doubles the risk. So keep the size steady after a loss, and let the edge play out over many trades, not one.
Risk Management Quick Reference
Keep this short list beside the platform. Run through it before you size any new trade.
- Risk in money equals balance times your chosen percent.
- Place the stop on the chart before you decide the size.
- Size the lot so the stop loss equals your risk in money.
- Set a target larger than the risk, often twice as far.
- Add up the risk on all open trades and cap the total.
- Track the drawdown, and trade smaller when it deepens.
Pitfalls and Edge Cases
A few situations bend the clean rules, so keep them in view. The chart below shows what happens when the rules are dropped entirely.
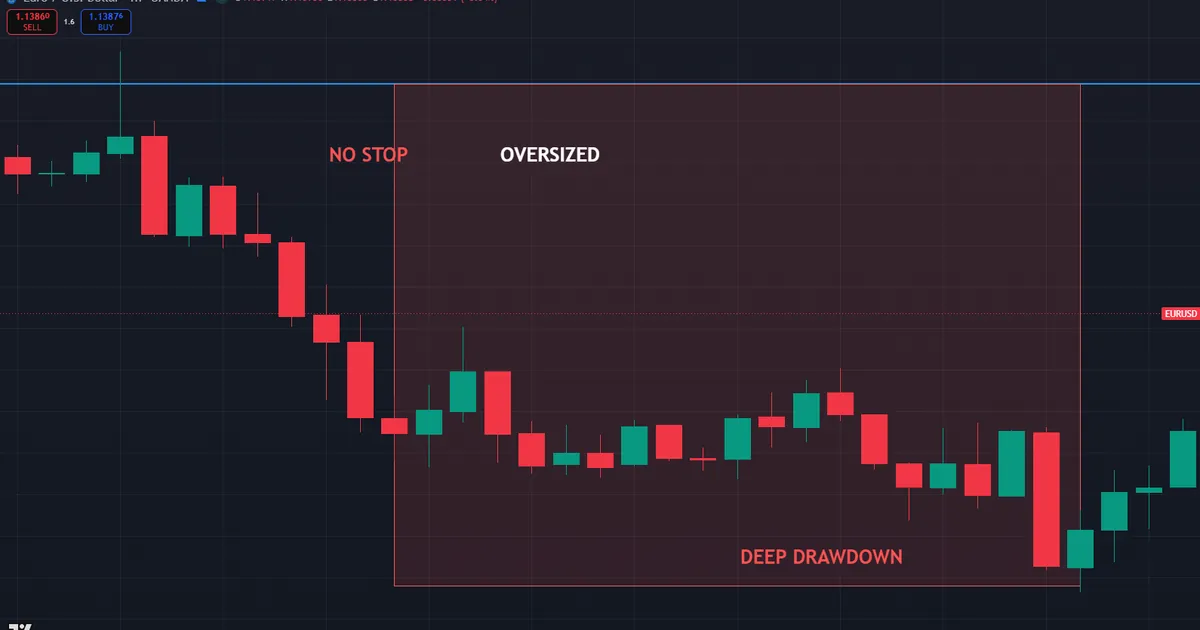
Picture a trade with no stop and an oversized lot. A single sharp move drives the account into a deep drawdown, and the recovery math turns brutal. That single image is the case for every rule above.
Slippage Widens the Real Loss
Your stop may fill a little past its level in fast markets. So the real loss can edge above the plan. Leave a small buffer in the risk, and treat the calculated figure as a floor rather than a hard ceiling.
Correlated Trades Stack the Risk
Two trades on linked pairs can act as one larger bet. Sizing each alone then understates the true exposure. So when trades share a driver, count them together, and split the risk budget across both.
Deep Drawdowns Need Bigger Recoveries
A loss and its recovery are not symmetric. A fifty percent drawdown needs a one hundred percent gain to get back to even. So a hard drawdown limit is not caution for its own sake; it protects the math of the comeback.
News Can Gap Past Your Stop
Around major news a price can jump straight over a stop level. So the fill lands worse than planned, and the loss runs larger. Trade smaller into known events, or stand aside until the dust settles.
Risk Management and Your Mindset
Rules only work when you follow them, and following them is a mental skill. The market tests your discipline exactly when a plan matters most, in the heat of a loss.
Good risk limits take that pressure off your shoulders. Because the loss is already capped, you do not have to make a hard choice mid-trade. So the rules act as a promise you made to yourself in a calm moment.
Write the plan down before the session starts. A stop, a size, and a total cap on paper are harder to ignore than a vague intention. So the simple act of writing turns good ideas into steady habits you can actually keep.
A Simple Weekly Review
Discipline also grows through review, not just planning. At the end of each week, read back through your trades and check whether the rules held. So the review turns raw results into feedback you can act on.
Look for the trades that broke a limit, even the winners. A rule broken on a win is still a rule broken, and it will bite on the next loss. Because you catch the slip early, you fix the habit before it costs you real money.
Related Concepts to Study Next
Risk management is a hub, and each pillar deserves its own reading hour. The amount you risk per trade sets the base, the position size turns that risk into a lot, and the stop anchors the whole plan.
Start with our guide on how much to risk per trade for the base rule. Then read position sizing to turn that risk into a lot, and how to use a stop loss to anchor each trade. For the reward side, see the risk reward ratio, and study drawdown in trading to guard the account over time. Our forex trading strategies hub then shows how risk control fits a complete plan.
FAQ
What is risk management in forex in simple terms?
Risk management is the set of rules that caps how much each trade can cost you. It fixes your loss before you enter, sizes the position to that loss, and aims for a reward larger than the risk. So the account survives losing streaks and keeps trading.
How much should I risk on a single trade?
Many traders risk around one or two percent of the balance on one trade. That level keeps a normal losing streak survivable. A smaller percent protects the account more, while a larger one exposes it to deeper drawdowns.
Do I really need a stop on every trade?
Yes, a stop is the floor under a losing trade. Without one, a single sharp move can run far past what you planned to lose. So set the stop before you enter, and let it close the trade if the idea fails.
How does position sizing fit into risk management?
Position sizing turns your chosen risk into an exact lot. It divides the money you will risk by the stop distance and the pip value. So the lot flexes with the stop while the dollar risk stays fixed.
What is a drawdown and why does it matter?
A drawdown is the drop from an account peak to a later low. It matters because deep drops need far larger gains to recover. So watching drawdown, and trading smaller when it grows, protects your long-run survival.
Can I trade without any risk management?
You can, but the odds turn sharply against you over time. A run of losses will arrive, and without limits it can end the account. Build the rules first, apply them on every trade, and manage each position with care. Results are not guaranteed; past performance is not indicative of future results.
External references
- For background on this concept, see Financial risk management on Wikipedia.
- For broader market context, see Risk Management Techniques at Investopedia.

About the author
Written by Dominic Walsh, a Forex trader and MT4/MT5 indicator, Expert Advisor and script developer. Every tool on forexmt4systems.com is tested on live charts before release and ships with ready-to-use compiled MT4 (.ex4) and MT5 (.ex5) files. Learn more about the trader and developer behind this site.
How we build, test and correct every tool: Editorial & Testing Policy. Trading carries risk; see the disclaimer.