
Evaluations rarely end because a strategy stopped working. They end because a position was too large for the rules, which makes prop firm risk management the whole job rather than a side task.
This guide builds a complete risk plan from the floor upward, and it names no firm at any point. You will convert rules into cash, size every trade from your stop, and survive an ordinary losing run.
Prop Firm Risk Management, From the Floor Upward
Start with one shift in priority. The room beneath your account matters far more than the target above it.
Traders who chase a target oversize and breach a limit. Traders who protect the floor drift toward the target almost by accident.
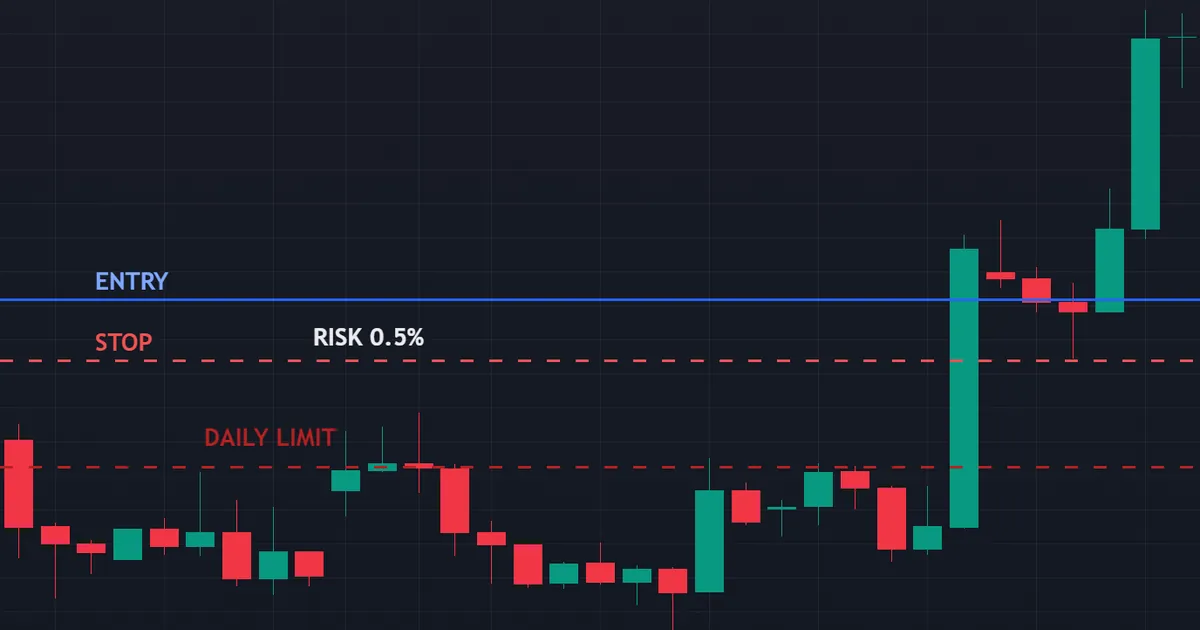
So decide your room first, then decide how large a position that room allows. Every other rule in this guide follows from that order.
Why the Floor Beats the Target
A profit target has no deadline in most programs. A loss limit ends the account the moment it breaks.
Asymmetry like that should shape your whole plan. Because one side of the ledger ends the game, it deserves the bulk of your attention.
The One Number That Decides Everything
Divide your maximum drawdown in cash by your risk per trade. The result counts the consecutive losses your account can absorb.
Aim for a count in the high twenties or better. Because a run of six or seven losses happens to everyone, a thin cushion turns an ordinary streak into a closure.
What Actually Ends Accounts
Rule breaches end most evaluations, not weak methods. A daily cap catches revenge trading, while a drawdown floor catches oversized positions.
Very few traders fail through lack of edge. Instead a workable method meets a position size the rules cannot absorb.
Risk Rules Beat Motivation
Willpower fades during a bad week. Written numbers do not.
So put every limit on paper before you trade. Because pressure erodes memory, a visible rule outperforms a remembered one.
The Six-Step Risk Framework
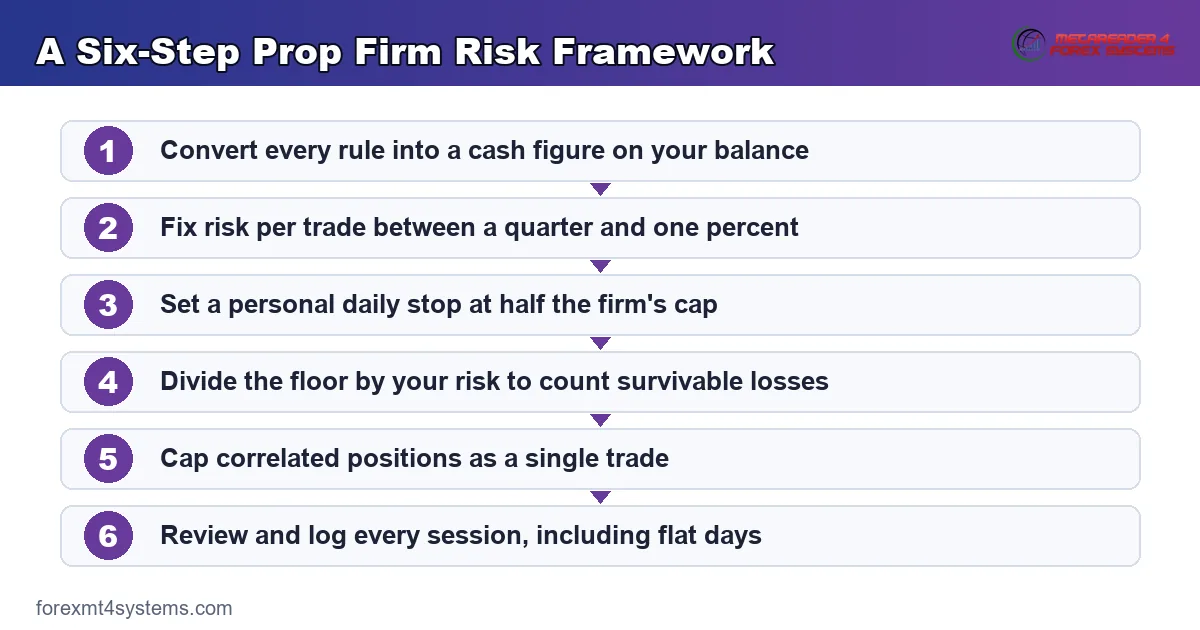
Six steps cover the whole plan. Work through them in order before your first position.
Print the list and keep it beside your platform. That single page settles most decisions during a difficult session.
- Convert every rule into cash. Turn each percentage into a currency amount on your exact balance.
- Fix your risk per trade. A quarter to one percent suits nearly every rule set.
- Set a personal daily stop. Roughly half the firm’s cap, obeyed without exception.
- Count your survivable losses. Floor divided by risk per trade, checked before every attempt.
- Cap correlated exposure. Treat related positions as one trade when you size.
- Review and log every session. Distance to the floor, distance to the target, any rule you bent.
Notice that only one step mentions the market. So the bulk of a risk plan sits in arithmetic and record keeping.
Revisit the six steps whenever your balance changes. Because percentage rules scale with the account, every cash figure needs a refresh after a payout or a reset.
Convert Every Rule Into Cash
Percentages hide danger. Write the drawdown floor, the daily cap and your risk per trade as real amounts, then tape them somewhere visible.
Cash figures change behaviour. Because a limit expressed in money feels concrete, most traders stop far sooner than a percentage would push them.
Choose a Risk Per Trade
Half a percent per trade suits most evaluations comfortably. A five percent daily cap then absorbs ten losses inside a single session.
Push that to two percent and the picture darkens quickly. Two losses eat most of a daily cap, and a modest streak reaches the floor within days.
Set a Personal Daily Stop
Never trade to the firm’s limit. Halve it, then treat your own number as the wall.
That buffer absorbs slippage, a bad fill or a news spike. So a wobbly session ends with a small dent rather than a closed account.
Count Your Survivable Losses
Run the division before every attempt, not after a bad week. A cushion of thirty losses feels very different from a cushion of eight.
Recheck the count whenever you change your stop distance. Because wider stops mean smaller lots, the arithmetic shifts more often than traders expect.
Risk Per Trade Against Risk Per Day
Two limits work together. One governs a single position, while the other governs a whole session.
Set both, then obey whichever bites first. So a run of small losses stops the day just as firmly as one large mistake would.
Measuring Risk in R Multiples
One unit of risk deserves its own label. Traders call it R, and it turns every rule into a simple count.
Speak in R rather than in currency during a session. Because the unit stays constant, comparisons across trades become instant.
Turning Targets Into R
Divide the profit target by your cash risk per trade. The answer tells you how many net R the evaluation demands.
A target worth twenty R sounds far more manageable than a percentage. So the count reframes the task as a schedule rather than a mountain.
Turning Limits Into R
Apply the same division to your floor and your daily cap. A floor worth twenty R and a cap worth four R describe your whole rule set.
Write both counts on the same card as your target. Because three numbers now define the account, decisions during a session get much simpler.
Expectancy in Plain Terms
Expectancy measures the average R you gain per trade over many trades. A small positive number, repeated patiently, moves an account forward.
Track it across at least fifty trades before you trust it. So a lucky fortnight never persuades you to raise your size.
Sizing Every Position Correctly
Position size does the heavy lifting. Get it right and the rules stop feeling hostile.
The method never changes. Cash risk divided by stop distance gives your lot size, whatever the instrument.
From Stop Distance to Lot Size
Start with your cash risk for the trade. Divide it by the distance between entry and stop, measured in the value of one pip or point.
Feed the numbers into a calculator rather than a guess. Because a rounding slip compounds across dozens of trades, precision here pays repeatedly.
Volatility and Stop Placement
Fixed pip stops ignore market conditions. A quiet session and a volatile one deserve different distances.
Use an average range measure to set the stop, then size from it. So your risk stays constant while your stop adapts.
Correlation and Portfolio Heat
Three trades on related pairs behave like one large trade. Your real exposure triples while each ticket looks modest.
Cap total open risk at a fixed percentage of the balance. Because correlated positions move together, that ceiling protects the daily cap during a sharp move.
Round Down, Never Up
Lot calculations rarely land on a tidy number. Traders who round upward add risk they never budgeted.
Always take the smaller lot. So a hundred small decisions push your risk down rather than up.
Spread and Commission Inside the Budget
Transaction costs sit inside your risk, not beside it. A wide spread on entry effectively moves your stop closer.
Add the round-trip cost to your stop distance before you size. Because costs bite hardest on tight stops, scalping styles need this adjustment most.
Managing the Drawdown Floor
Floors come in two shapes, and they demand different habits. Confirm which one applies before your first order.
A static floor sits at a fixed level from the start. A trailing floor climbs behind your equity as the account grows.
How a Trailing Floor Moves
Every new equity high lifts the floor beneath you. Your cushion therefore shrinks in cash terms exactly when confidence rises.
Some programs freeze the floor once you clear the starting balance. Because that detail changes the arithmetic completely, read the wording rather than assuming.
Recalculating After a Winning Day
Update the cash distance to the floor at every session close. A figure from last week means nothing after a strong run.
Write the new number beside your daily stop. So tomorrow starts with the real distance rather than a comfortable memory.
Equity Floors and Open Trades
Many floors watch equity rather than closed balance. A position that dips before recovering can breach the limit anyway.
Keep stops tight enough that no single trade threatens the floor. Because unrealised losses count, an open position carries the same weight as a closed one.
Static Floors and Early Profit
A static floor rewards traders who gain ground early. Every unit of profit adds directly to the cushion beneath you.
Resist the urge to spend that cushion on larger positions. So the extra room protects you through a rough patch instead of funding one.
Journalling the Numbers That Matter
A journal turns a risk plan into evidence. Without records, drift stays invisible until the floor arrives.
Keep the log short enough to finish daily. Because a long template gets abandoned, five fields beat twenty.
The Five Fields Worth Logging
Record your cash risk, the R outcome, the distance to the floor, the distance to the daily cap, and any rule you bent.
Add one sentence about the session. So a monthly review reads like a story rather than a spreadsheet.
The Weekly Review
Spend fifteen minutes each weekend on the week’s entries. Look for creeping lot sizes, widened stops and clustered losses.
Fix one habit at a time. Because several changes at once muddy your data, single adjustments teach more.
What the Journal Reveals
Most traders discover their damage sits in a handful of sessions. Those days usually follow a loss or a missed setup.
Name the pattern and write a rule against it. So the next similar morning already has an answer waiting.
A Worked Example of a Risk Plan
Numbers settle this faster than theory. Picture a fifty thousand unit account with a five percent daily cap and a ten percent floor.
Your floor sits five thousand units below the start. The daily cap allows two thousand five hundred units, and your personal stop halves that figure.
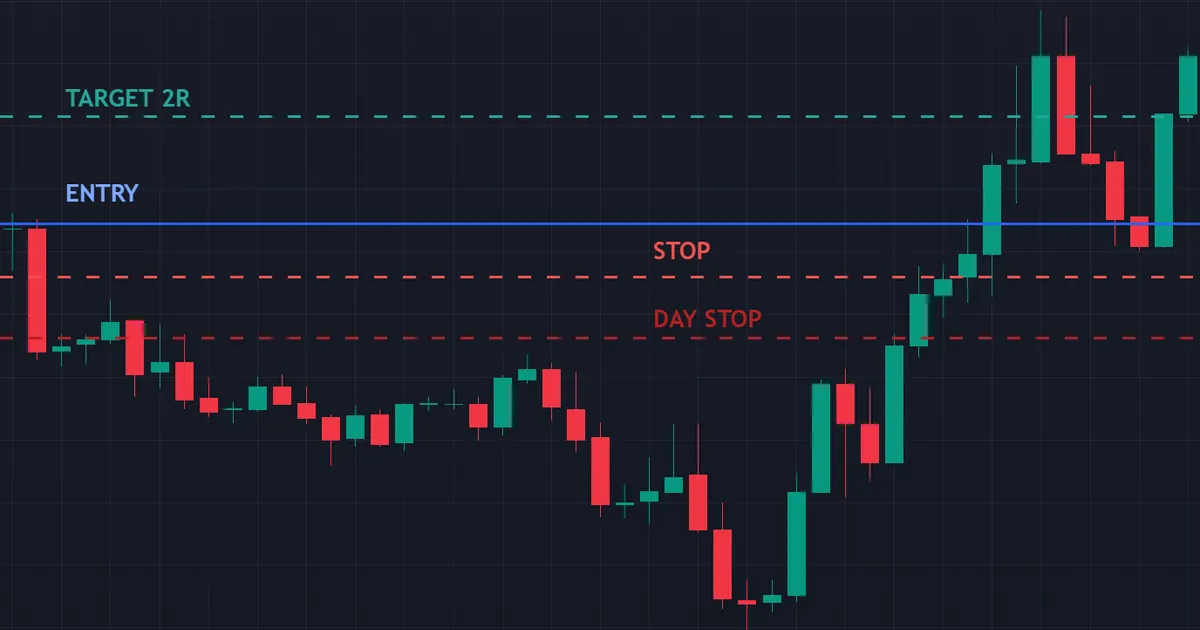
Risk half a percent per trade and each loss costs two hundred and fifty units. Your personal daily stop of one thousand two hundred units therefore absorbs four losses.
Building the Numbers
Twenty survivable losses sit between you and the floor. That cushion covers an ordinary bad patch with room to spare.
Cap total open risk at one percent of the balance. So two correlated positions never behave like a single oversized one.
A Normal Week
Take six setups across four sessions. Book three winners at twice risk and three losers at one.
Your net gain equals seven hundred and fifty units. Nothing dramatic happened, and the floor never moved closer.
A Bad Morning
Picture four losses before lunch. You sit one thousand units down, inside your personal stop and far from the firm’s cap.
Close the platform and log the session. Because the floor remains four thousand units away, tomorrow starts with the plan fully intact.
The Same Morning at Two Percent
Four losses would now cost four thousand units. That lands you on the floor and ends the account before lunch.
One variable produced both outcomes. So sizing, not strategy, separated survival from closure.
Download the complete indicator database
Put these concepts on your charts. One email unlocks the full library of 1,380+ indicators with compiled MT4 and MT5 files, plus my TradingView scripts. No paywall, no spam, unsubscribe any time.
Get free access to my indicator database
One email unlocks 1,380+ free MT4, MT5 and TradingView indicators — the complete library. No single-tool download; you get the whole database.
Common Risk Management Mistakes
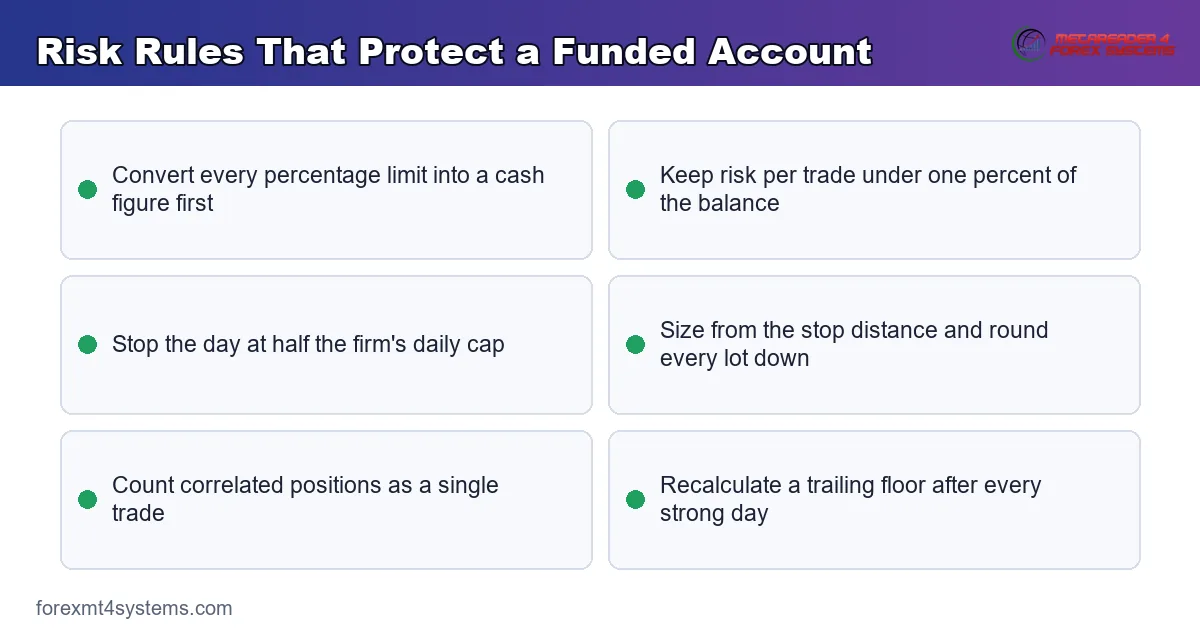
Six errors account for most closed accounts. The graphic below lists the rules that keep a funded balance alive.
Sizing Backwards From the Target
Dividing the target by the days remaining produces an oversized position. One bad session then ends everything. So calculate from the floor and let the target take as long as it takes.
Trading to the Firm’s Daily Cap
Using the full cap leaves no room for a bad fill or a news spike. A breach costs the whole fee. So set a personal stop at roughly half the limit and honour it.
Widening a Stop to Avoid a Loss
Moving a stop converts a planned small loss into an unplanned large one. It also destroys your sizing arithmetic. So place the stop once and leave it alone.
Adding to a Losing Position
Averaging down doubles exposure exactly when the thesis looks weakest. Daily caps punish that habit fast. So add only to positions already moving your way, and only inside your total risk cap.
Ignoring Correlated Exposure
Several trades on related instruments move as one. Traders count three small risks and carry one large one. So treat correlated positions as a single trade when you size.
Forgetting to Recalculate
Balances change after payouts, resets and scaling steps. Old cash figures then understate the real limits. So refresh every number whenever the balance moves.
Daily Risk Checklist
Run this list before each session. It takes a minute and keeps the plan honest.
- Write the drawdown floor as a cash figure on today’s balance.
- Write the daily cap as cash, then halve it for your personal stop.
- Confirm whether the floor sits static or trails your equity.
- Recalculate the distance to a trailing floor after any strong day.
- Fix risk per trade between a quarter and one percent.
- Divide the floor by that risk to count survivable losses.
- Size every position from the stop distance, never from the target.
- Round every lot calculation downward.
- Cap total open risk across all positions.
- Count correlated trades as one position.
- Trade lighter around major data releases.
- Halve your size after two losing days.
- Log the session, including the flat ones.
- Stop for the day once your personal limit arrives.
- Add spread and commission to the stop distance before sizing.
- Express the target, the floor and the cap in R multiples.
- Check the filled volume on every order before leaving the screen.
- Refresh every cash figure after a payout, reset or scaling step.
Pitfalls and Edge Cases
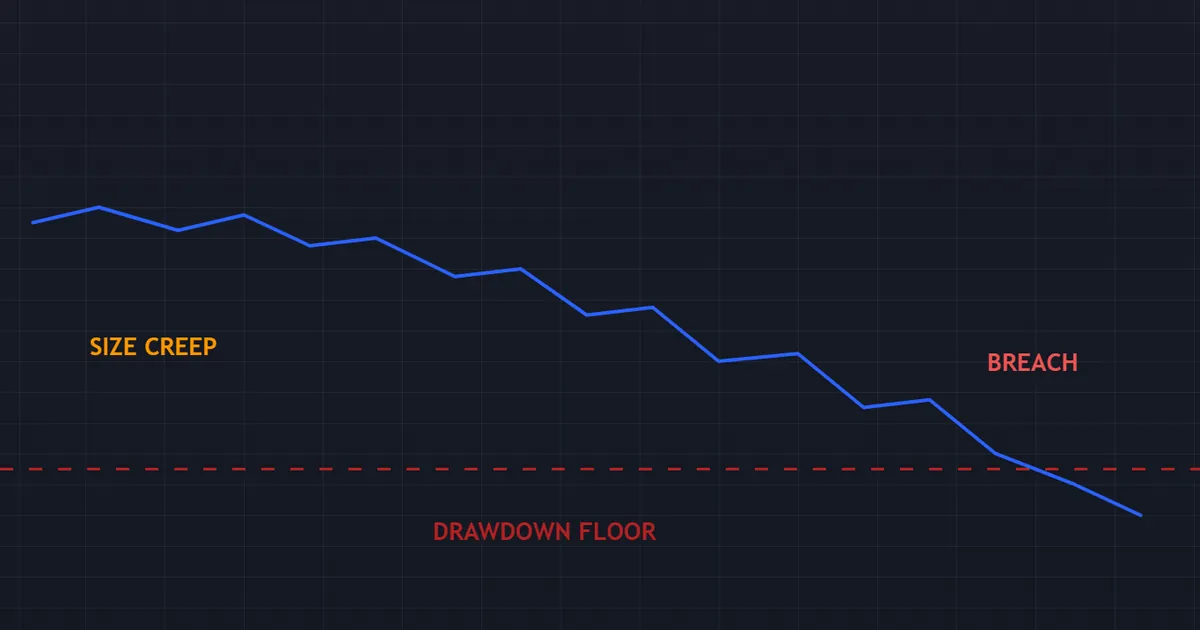
A few wrinkles catch disciplined traders too. The chart below shows an equity path where creeping size pierces the floor.
Slippage Around News
Fast releases can jump a price straight through your stop. One gap then erases a careful week. So trade smaller around major data, or stand aside completely.
Weekend Gaps on Open Positions
A position held across a weekend can open far from Friday’s close. Equity floors react instantly to that jump. So close or reduce exposure before the weekly break.
Swap Charges That Move the Floor
Overnight financing quietly reduces equity on longer holds. Traders near a floor sometimes breach it without a single bad trade. So include swap in your distance calculation.
Dashboard Figures That Lag
Some panels refresh remaining room only every few minutes. Trading off a stale number invites an accidental breach. So track your own daily loss in a note and treat the dashboard as a second opinion.
Consistency Clauses and Big Days
A very profitable session can stall a payout under a consistency rule. Risk management therefore includes capping your upside pace. So spread gains across the cycle rather than chasing one large day.
Partial Fills and Requotes
An order that fills partly leaves your risk different from your plan. Traders rarely notice until the stop hits. So check the filled volume before you walk away from the screen.
Position Size Creep
Lots drift upward slowly during a good run. Nobody notices a small increase, yet the cumulative effect doubles risk. So recompute the lot from your written rules every session.
Recovering From a Drawdown
Every account meets a bad patch eventually. The response decides whether it becomes a closure.
Plan the protocol before you need it. Because judgement fades during a losing run, a written rule carries you through.
Halve Your Size First
Cut your risk per trade in half after two losing days. Return to normal only once you post a clean session.
Smaller size buys time. So the floor stays distant while you find your footing again.
Rebuild in Small Steps
Recovering a deep drawdown needs a larger percentage gain than the loss itself. That arithmetic punishes anyone who tries to win it back quickly.
Aim for steady singles instead. Because compounding works quietly, patience recovers ground that aggression cannot.
Know When to Stop Entirely
Some weeks simply refuse to cooperate. Standing aside costs nothing and protects the balance you still hold.
Take a full day away after a heavy loss. If trading starts affecting your sleep, your finances or your relationships, step back and seek qualified professional support.
Related Concepts to Study Next
A risk plan touches several nearby topics, so a little extra reading pays off. Start with the rules, then the arithmetic.
Read our guide to prop firm drawdown rules for the limits in full, then study daily drawdown at prop firms for the cap that ends most sessions. Because a moving floor changes everything, read our notes on trailing drawdown and our honest look at why traders fail prop challenges. For the arithmetic, study position sizing and our guide to the daily loss limit, then check every lot with our prop firm position size calculator and test your cushion with the risk of ruin calculator.
FAQ
What does prop firm risk management actually involve?
It means turning every rule into a cash figure, then sizing each position so a normal losing streak cannot reach the floor. A personal daily stop, a fixed risk per trade and a cap on correlated exposure do most of the work. Everything else follows from those three numbers.
How much should I risk per trade?
A quarter to one percent of the balance suits nearly every rule set. At half a percent, a five percent daily cap absorbs ten losses in one session. Larger risk shortens that cushion sharply, which is why most closures trace back to sizing.
Why set a personal stop below the firm’s cap?
The firm’s cap has no buffer for slippage, a bad fill or a news spike. Stopping at half that figure keeps a wobbly session survivable. It also removes the temptation to trade right up to the edge.
How do I handle a trailing floor?
Recalculate the cash distance to the floor after every session, especially a profitable one. A trailing floor climbs behind your equity, so your cushion shrinks as the balance grows. Never size from a figure you worked out last week.
What should I do after several losing days?
Halve your risk per trade and keep it there until you post a clean session. Avoid widening stops or adding to losers, since both destroy your arithmetic. A measured streak leaves the floor untouched, which is the whole point.
How many trades can I hold at once?
Judge that by total open risk rather than by ticket count. Cap the combined risk across every position at a fixed percentage of the balance. Treat correlated instruments as one trade, since they tend to move together during sharp sessions.
Can good risk management make a funded account safe?
No, it reduces the chance of a breach without removing it, because markets gap and platforms fail. Treat the plan as protection rather than certainty, and keep other income in place. Results are not guaranteed; past performance is not indicative of future results.
External references
- For background on this concept, see Value at Risk (VaR) at Investopedia.
- For broader market context, see Monte Carlo Method on Wikipedia.

About the author
Written by Dominic Walsh, a Forex trader and MT4/MT5 indicator, Expert Advisor and script developer. Every tool on forexmt4systems.com is tested on live charts before release and ships with ready-to-use compiled MT4 (.ex4) and MT5 (.ex5) files. Learn more about the trader and developer behind this site.
How we build, test and correct every tool: Editorial & Testing Policy. Trading carries risk; see the disclaimer.