
Most guides on how to create a trading plan hand you a template and wish you luck. The blank fields then sit there for weeks, because nobody explained what decides each answer.
This guide works the other way round. Every step below states the decision you have to make, the options you are choosing between, and the cost of getting it wrong.
How to Create a Trading Plan: The Build Order
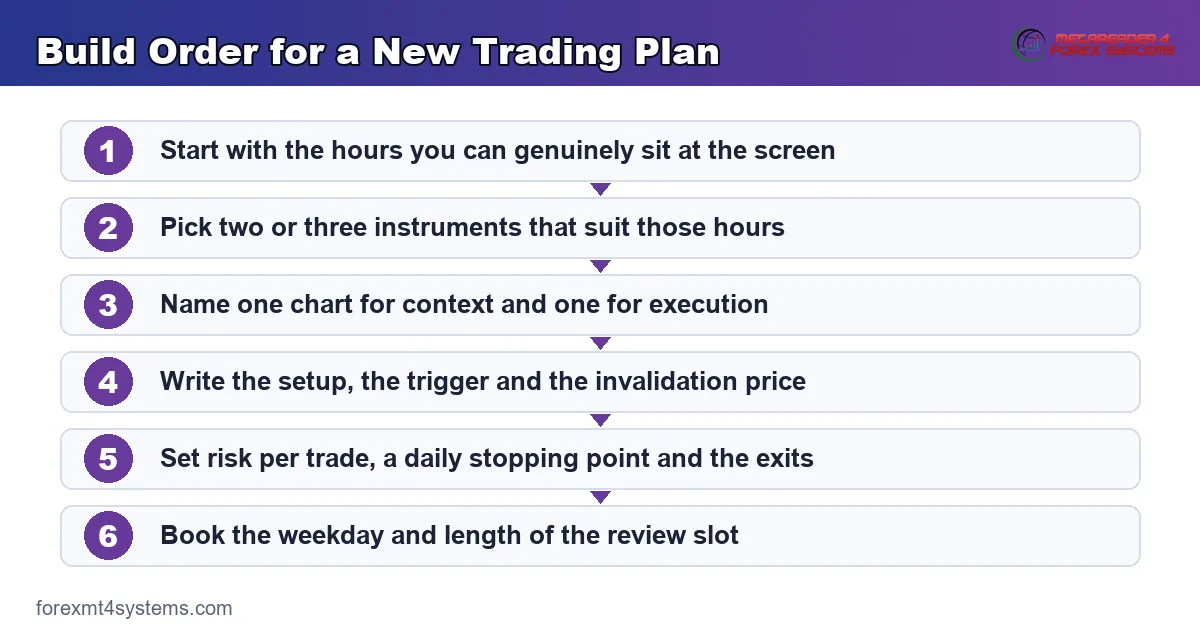
Build the document from the outside in. Broad constraints first, then the trade itself, then the money, then the feedback loop.
Order matters because each answer narrows the next one. Pick your session before your setup, and half the setups rule themselves out on their own.

The panel above shows the sequence. Nine decisions, taken once, produce a document you can read in under a minute.
Why Building Backwards Fails
Plenty of traders start with the entry, since that part feels exciting. Then the entry turns out to need a chart they never watch during hours they never work.
So the entry gets rewritten, and the rewrite invalidates the exit. Two hours later the document contradicts itself in three places.
Going outside in avoids that loop entirely. Nothing you decide later can undo something you decided earlier.
There is a second benefit too. Working outward from your calendar keeps the plan attached to your life, rather than to an idealised trading day nobody actually lives.
What You Need Before You Start
Three things make the drafting session productive. None of them takes long to gather.
First, a fortnight of your real calendar. Mark the hours you were genuinely free, not the hours you meant to be free.
Second, a rough method. It can be crude, and it has to exist, because four of the nine decisions describe how you find trades.
Third, your account size and a calculator. Risk decisions turn into lot sizes at the end, and vague arithmetic there undoes everything above it.
The Nine Decisions
Here is the full sequence. Each line is a choice, not a fill-in-the-blank prompt.
- Which hours can you actually sit at the screen? Choose real availability over an ideal week.
- Which two or three instruments? Choose repetition over variety.
- Which two charts? One frames context, one places the order.
- What makes a chart worth watching? Choose conditions anybody could verify.
- What single event puts you in? Choose an event, never a feeling.
- Which price ends the idea? Choose it before entry, every time.
- How much does one idea cost you? Choose a percentage of the account.
- How does a trade end when it works? Choose target, partial, trail or time.
- When do you read your own records? Choose a weekday and a duration.
Answer all nine and the document writes itself. Skip one, and that gap becomes the decision you improvise under pressure.
Decisions One to Three: What and When
The first three answers set the boundaries. They also do most of the filtering, so spend real time here.
Decision One: Your Actual Hours
Write the clock hours you can genuinely sit down, in your own timezone. A parent with a school run at eight has different hours than somebody working nights.
The trap here is aspiration. Traders write the London open because articles praise it, then miss four sessions out of five.
Pick the window you can hit every day this month. Consistency beats the theoretical quality of any particular session.
Decision Two: Your Instruments
Two or three pairs is plenty. Fewer instruments mean more looks at the same behaviour, and repetition is how pattern recognition forms.
Match the instrument to the hours you just chose. A pair that barely moves during your window will bore you into trading something else.
Watch correlation as well. Two closely linked pairs often deliver the same trade twice, which quietly doubles your risk while feeling like diversification.
Write the list, then commit to it for a quarter. Swapping instruments monthly resets your sample every time, so nothing ever accumulates.
Decision Three: Your Two Charts
One chart for context, one for execution. A common pairing puts the higher chart four to six times slower than the execution chart.
Write both, then treat the pairing as locked. Dropping a level lower after a loss is the single most common unplanned change traders make.
Decisions Four to Six: The Trade Itself
Now define the trade. These three lines carry most of the wording risk, so test each one against last month’s charts before committing.
Read them as a sequence rather than three separate rules. The setup earns your attention, the trigger spends it, and the invalidation caps what that decision can cost.
Decision Four: The Setup Condition
A setup describes a state, not an action. Something like a higher chart holding above its marked level, or price arriving at a zone you drew on Sunday.
Keep it to two conditions at most. Three or more, and the setup appears so rarely that you will start bending it out of boredom.
If chart tools help you read that state, name them explicitly. Our trend indicators archive lists options, and whichever you choose, pin the settings in the plan.
Beware of stacking confirmations. Each extra condition feels safer and cuts your sample, so you learn slower while the underlying method stays exactly the same.
Decision Five: The Trigger Event
The trigger turns a watched chart into a live order. One event, phrased so a stranger could confirm it happened.
A close beyond a level works. A break of the previous bar’s high works. Price looking strong does not work, because two people will disagree about it.
Traders who blur setup and trigger enter early almost every time. Separating the two is the cheapest patience upgrade available.
Decision Six: The Invalidation Price
Choose the price proving you wrong before you place anything. That number then drives your stop, and your stop drives your size.
Ranges work better than exact ticks here. Say beyond the swing that formed the setup, rather than a fixed pip count that ignores conditions.
Volatility deserves a mention in this line. A stop measured in multiples of recent range adapts to quiet and busy weeks, whereas a flat number suits only one of them.
Whatever you choose, write how the stop moves afterwards. Silence on that point is how a small planned loss quietly becomes a large improvised one.
Test Each Line Against Last Month
Before committing to the wording, scroll back four weeks. Read the rule aloud and mark every place it would have fired.
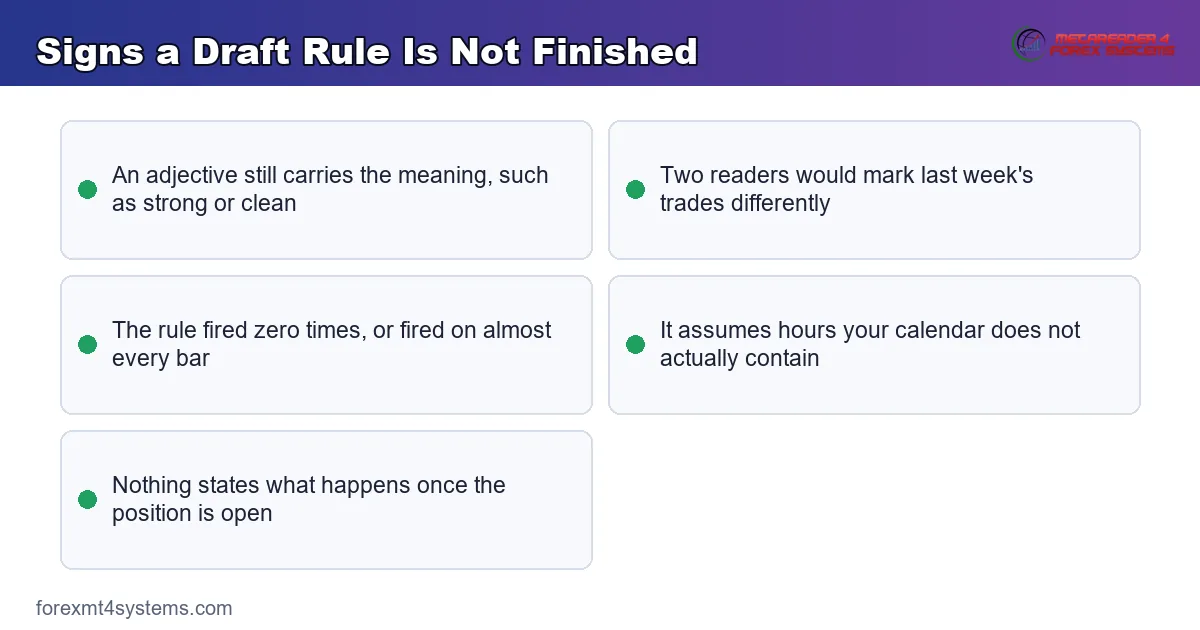
Two outcomes tell you the line needs work. Zero occurrences means the conditions are too tight, while thirty occurrences means they describe almost nothing.
Somewhere between four and fifteen a month suits most people. That range gives enough repetition to learn from without turning the screen into a slot machine.
Do this by hand, not with software. Marking bars yourself shows you exactly which phrase caused the ambiguity, and a backtest never will.
Decisions Seven to Nine: Money and Feedback
The last three answers protect the sample. Without them, a run of ordinary losses can end the experiment before it says anything.
Decision Seven: Risk Per Trade and Per Day
State risk as a percentage of the account. Half a percent and one percent are both common choices, and the exact figure matters less than writing one down.
Add a daily stopping point beside it. Our guide to the daily loss limit covers how traders pick that number sensibly.
Then let the arithmetic follow. Our position size calculator converts risk and stop distance into a lot size, so nothing depends on how you feel.
Decision Eight: How a Trade Ends
Write every exit you might use, then delete all but two. A fixed target and a time stop cover most situations without adding decisions mid-trade.
Partial exits deserve care. They feel comfortable and they cut your largest results, so include them only when your records justify it.
Deeper mechanics live in our note on position sizing, which connects stop distance to the size of every outcome.
Decision Nine: The Review Slot
Name a weekday and a length. Friday afternoon for twenty minutes suits many people, and any fixed slot beats an open intention.
Say what you read as well. Rules followed, size consistency, and any repeated note from the week all belong in the list.
Guard the slot like an appointment with somebody else. Reviews that happen only when the week went smoothly skip precisely the weeks worth reading.
Finish each review with one written action. A single sentence naming what changes next week keeps the session from turning into idle scrolling.
Decide What You Will Not Do
A short list of prohibitions belongs beside the nine answers. Each one closes a door you would rather not open at speed.
Three cover most traders. No adding to a losing position, no trading in the minutes around a scheduled release, and no second trade immediately after a loss.
Phrase them as flat refusals. Conditional wording invites negotiation, and negotiation is exactly what the list exists to prevent.
Putting the Nine Decisions on One Page
Once the answers exist, the document is a formatting job. One page, nine short blocks, plain language throughout.

The panel above shows a completed one-page layout. Notice that no line contains an adjective doing real work, because every claim resolves to something you can check.
Keep the Wording Short
Long sentences hide ambiguity. A rule you can read aloud in one breath tends to mean exactly one thing.
Read each line back and ask a simple question. Could somebody else mark last week’s trades against this rule without asking you anything?
Store It Where You Will See It
A plan buried three folders deep gets opened once. Pin the file, print it, or paste it into the note that opens with your platform.
Then log against it from day one. Our trade journal makes the rules-followed column easy to keep, and that column is what the review actually needs.
Date and Version the File
Put a date at the top and a version number beside it. Both take four seconds and settle arguments with yourself months later.
Keep old versions rather than overwriting. A folder of dated drafts shows how your thinking moved, and that history often explains a change in results.
Add one line under each edit. A short reason turns the archive into a record of decisions rather than a pile of files.
Download the complete indicator database
Put these concepts on your charts. One email unlocks the full library of 1,380+ indicators with compiled MT4 and MT5 files, plus my TradingView scripts. No paywall, no spam, unsubscribe any time.
Get free access to my indicator database
One email unlocks 1,380+ free MT4, MT5 and TradingView indicators — the complete library. No single-tool download; you get the whole database.
Common Mistakes While Building
Five errors show up in almost every first draft. The panel below lists the signs that a rule needs another pass.
Writing the Plan You Wish You Followed
Ambition sneaks in during drafting. Four charts, three sessions, and a hundred pages of preparation look impressive on Sunday evening.
Write the version you would follow on a bad Wednesday. Anything you would skip when tired does not belong in the document.
Leaving Adjectives in the Rules
Words like strong, clean and clear feel precise and measure nothing. Each one becomes a licence to take whatever you fancy at the time.
Swap every adjective for a condition. The rule gets uglier and considerably more useful.
Adding a Rule for Every Bad Trade
One painful loss produces a new clause. Ten losses later the plan runs to three pages and contradicts itself.
Collect complaints, then handle them in one review. Batching edits keeps the document coherent and shows you which problems actually repeat.
Copying Somebody Else’s Hours
A plan built for a full-time trader assumes a full-time schedule. Copy it around a job and the rules will fight your calendar every single day.
Borrow the structure, and answer the questions yourself. Our trading plan example exists as a shape to adapt.
Building Around a Target Instead of a Process
Some drafts open with a monthly percentage goal. The market does not read goals, so the number simply pushes you into trades on quiet weeks.
Set process targets instead. Sessions attended, rules followed and reviews completed all sit inside your control, and each one can be counted honestly.
Skipping the Review Slot
The review is the only part that improves the other eight. Traders drop it first, then wonder why nothing changes over six months.
Quick Reference: The Decision at Each Step
Use this table while drafting. Each row names the choice and the failure that follows from ducking it.
| Step | The decision | What goes wrong without it |
|---|---|---|
| 1. Hours | Real availability, in your timezone | Missed sessions and a plan you cannot follow |
| 2. Instruments | Two or three, matched to those hours | Thin repetition and slow learning |
| 3. Charts | One for context, one for execution | Timeframe drops after every loss |
| 4. Setup | Two verifiable conditions at most | Setups that appear everywhere or nowhere |
| 5. Trigger | One event a stranger could confirm | Early entries on a feeling |
| 6. Invalidation | The price that ends the idea | Stops chosen to fit a preferred size |
| 7. Risk | A percentage per trade and per day | One bad afternoon undoing a month |
| 8. Exits | Two rules, written before entry | Mid-trade improvisation |
| 9. Review | A weekday and a duration | Drift nobody notices for months |
Running the Plan for the First Month
A new document needs a settling period. Treat the first month as data collection rather than a verdict.
Follow It Exactly, Even When It Looks Wrong
Deviating during month one destroys the experiment. You end up with a record of neither the plan nor your instincts, so nothing can be judged.
Note the disagreements instead. Every time the rule felt wrong, write a line explaining why, and save it for the review.
Count Compliance Before Anything Else
At the first review, ignore the balance completely. Count how many trades followed all nine decisions, and how many did not.
Anything under eight in ten signals a wording problem rather than a discipline problem. Rules people cannot follow are usually rules that ask for something impractical.
What Happens After the First Draft
A first draft is a hypothesis about your own behaviour. Reality will disagree with parts of it within a fortnight.

Drift Arrives Quietly
The panel above shows the usual pattern. Size creeps upward, the stop widens a little, and one extra instrument appears on the watchlist.
No single step looks unreasonable. Together they leave you running a method the document no longer describes.
Catch It With a Comparison
Only a side-by-side reading exposes drift. Put the logged trades next to the written rule, then count how many matched.
Do that weekly for a month and the pattern becomes obvious. Most traders find the drift concentrated in one rule rather than spread across all nine.
Then ask which direction it moved. Drift toward more trades usually points at boredom, while drift toward larger size usually points at impatience after a flat stretch.
Edit on Schedule, Never Mid-Trade
Changes belong at review time, with a date and a reason beside them. An edit made while a position runs is not an edit; it is a rescue.
Change one line per review. Editing several at once leaves you guessing about which change did what.
Give every edit a trial period as well. Twenty trades before the next judgement stops you reversing a sensible change after two unlucky sessions.
Related Guides Worth Reading Next
Two neighbouring pieces make the build easier. Read them in either order.
Start with the definition in what a trading plan is, which explains why each component exists. After drafting, use the pre-trade checklist to convert the document into something you actually run before clicking.
A fixed daily trading routine then wraps the whole thing in a schedule. The routine decides when you look, and the plan decides what you do when you get there.
One last suggestion for the drafting session itself. Write the whole document in a single sitting, however rough, because a half-finished plan tends to stay half-finished.
Polish comes later, at review time. A crude nine-line answer sheet you follow beats an elegant document you never quite complete.
FAQ
How long does it take to create a trading plan?
An afternoon for the first draft, then several weeks of small corrections. The nine decisions themselves take perhaps two hours if you already know your schedule and your method. Everything after that comes from running the plan and fixing the lines that turned out to mean two things.
Do I need a strategy before I write the plan?
You need at least a rough one. Steps four, five and six describe how you find and enter trades, so they cannot be answered in the abstract. Traders still testing ideas can write the other six decisions immediately, since hours, instruments, risk and review apply regardless of method.
Should the plan cover more than one strategy?
It can, provided each strategy gets its own setup, trigger and exit block. Keep the shared parts shared: hours, instruments, risk limits and review slot rarely differ. Two strategies in one document work fine, while five usually means none of them gets enough repetition to judge.
What if I cannot decide on a risk percentage?
Start low and adjust upward later. Half a percent per trade keeps a run of losses survivable while you learn how the method behaves. Moving up is straightforward once the record justifies it, whereas recovering from a size that was too large is not.
How detailed should the exit rules be?
Detailed enough to remove decisions during the trade. Two rules usually suffice: one that ends the trade at a level, and one that ends it after a set time. Adding trailing logic and partials before you have records to justify them tends to create more decisions rather than fewer. Revisit the exit block after fifty trades, since that is roughly where your record starts showing whether the simple version left anything on the table.
Should I write the plan before or after opening an account?
Before, wherever possible. Drafting on a demo account costs nothing and lets you test the wording against live charts without any money involved. The exception is the risk section, which tends to feel abstract until real balances exist, so revisit those two lines once you fund the account.
Will following a plan make me a better trader?
It makes you a more consistent one, which is different. Consistency lets you judge a method fairly, because the trades you took resemble the trades the method describes. If the method has no advantage, following it closely produces a cleaner record of that fact rather than a change in outcome, so build the plan to measure your process first. Results are not guaranteed; past performance is not indicative of future results.
External references
- For background on this concept, see Standard Operating Procedure on Wikipedia.
- For broader market context, see Investment Policy Statement at Corporate Finance Institute.

About the author
Written by Dominic Walsh, a Forex trader and MT4/MT5 indicator, Expert Advisor and script developer. Every tool on forexmt4systems.com is tested on live charts before release and ships with ready-to-use compiled MT4 (.ex4) and MT5 (.ex5) files. Learn more about the trader and developer behind this site.
How we build, test and correct every tool: Editorial & Testing Policy. Trading carries risk; see the disclaimer.