
Most trading advice tells you to stay disciplined. A pre trade checklist replaces that vague instruction with something you can run, because every line on it either passes or fails.
One rule governs the whole list. If you cannot answer an item yes or no within ten seconds, it does not belong on the list at all.
What a Pre Trade Checklist Really Does
The list does not find setups for you. It sits between the setup and the order ticket, and it blocks anything that misses a condition you already agreed to.
So the value comes from the gate, not from the analysis. Your edge, if you have one, lives in the strategy. The checklist only makes sure you apply that strategy the way you wrote it.
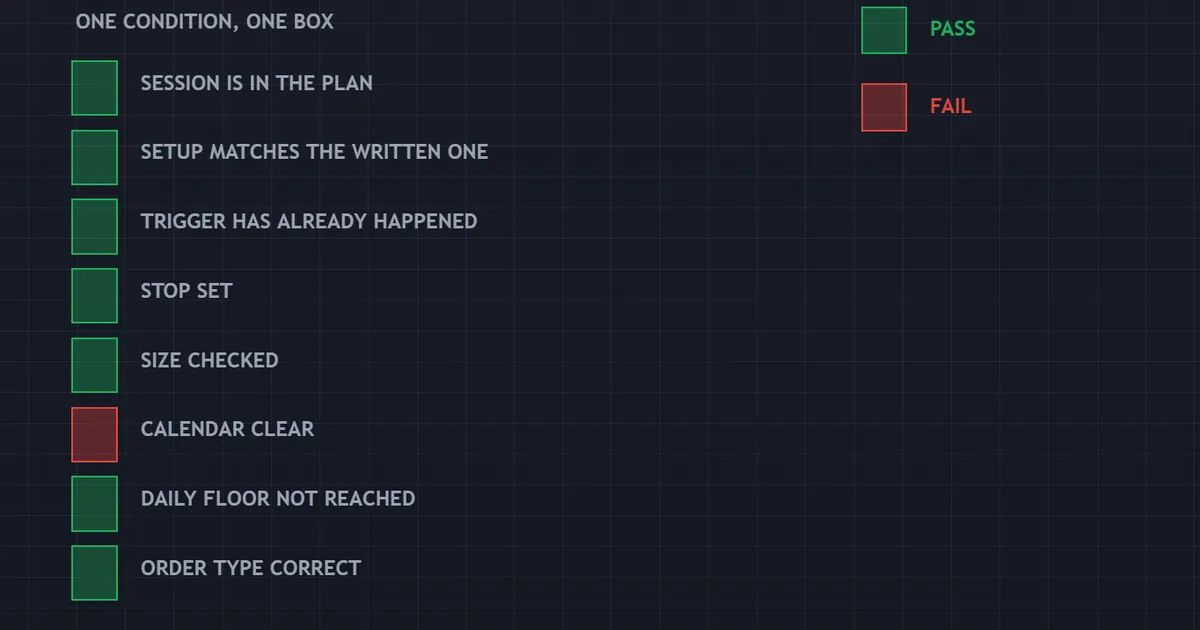
The panel above shows the shape of it. Each row carries one condition and one box, so the answer lands in the box rather than in your head.
Pass or Fail, Nothing In Between
Here lies the whole difference between a working checklist and a motivational poster. “The trend looks good” cannot fail, because nobody can prove it wrong at the moment you type it.
Compare that with “the daily close sits above the two hundred period moving average”. Either it does or it does not, and the chart settles the argument in a second.
Every item below meets that standard. Each one names a number, a price, a file or a calendar entry that exists outside your opinion.
A Gate, Not a Strategy
Traders sometimes expect the list to improve their entries. That expectation misses the point and usually ends in disappointment.
A gate removes trades that break your own rules. It cannot turn a poor rule into a good one, and it makes no promise about outcomes at all.
What it does deliver is comparability. When every trade clears the same conditions, your records finally describe one process instead of twenty improvised ones.
Where the Idea Came From
Aviation adopted written checklists in the nineteen thirties, after a prototype bomber lifted off with its control locks still fastened. The crew lacked no skill whatsoever; the aircraft simply held more steps than memory handles reliably under pressure.
Surgery borrowed the format decades later. Hospitals that adopted a short pre-operation list reported fewer avoidable errors, and the mechanism travels to trading for the same reason.
Markets do add one twist. Nobody sits beside you calling out the items, so the discipline has to come from the trader rather than from a co-pilot.
The Twelve Checks in Order
Run them top to bottom. The early ones cost nothing and kill the worst trades before you spend any effort on the rest.
Checks One to Six: Account and Risk
- Risk per trade matches the plan figure. Test: the currency amount you are risking equals the number written in your plan, to the decimal. Reason: size creep is the fastest route to an outsized loss.
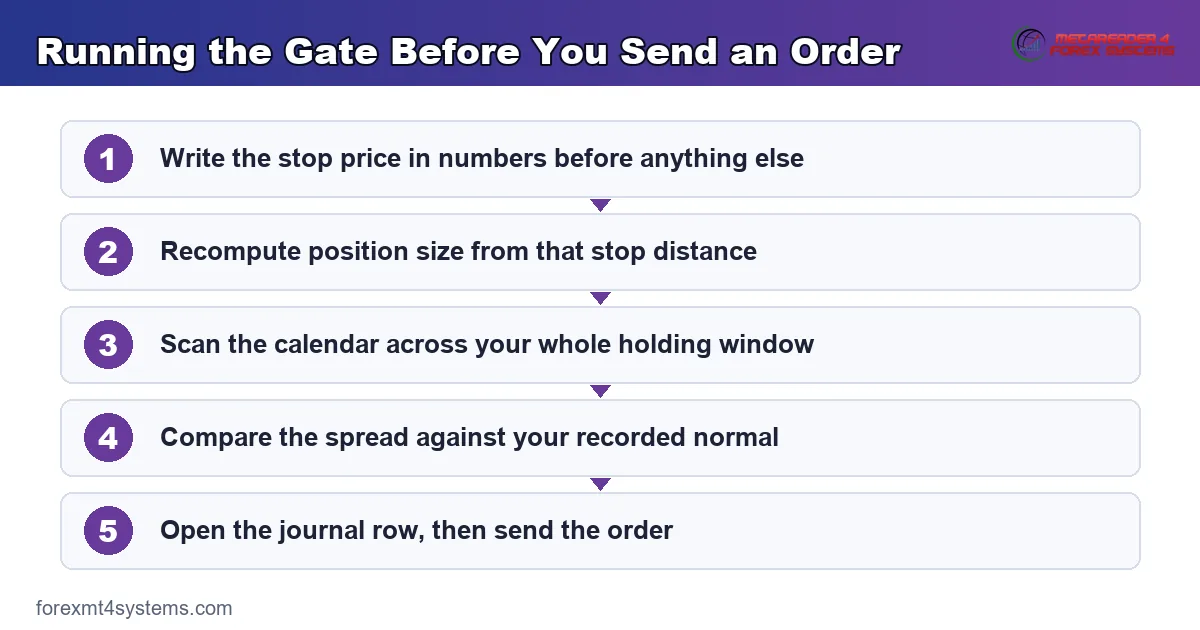
- A stop price exists, stated in numbers. Test: you can type the exact stop price into the ticket right now. Reason: without an invalidation price, the trade has no defined loss.
- Position size comes from the stop distance. Test: recompute lots from risk divided by stop distance, then compare against the ticket. Reason: habit sizing ignores how far away the stop actually sits.
- Today’s loss limit remains unbreached. Test: today’s closed profit and loss sits above your daily floor. Reason: trading past the floor turns a bad day into a bad month.
- Total open risk stays under the cap. Test: add the risk on every open position, in R, and compare against your cap. Reason: five separate trades can add up to one enormous bet.
- No currency overlap with an open position. Test: does this pair share a currency with anything already running? Yes or no. Reason: overlapping pairs double a single view without doubling the thinking.
Checks Seven to Twelve: Market, Setup and Record
- The calendar covers your holding window. Test: open the calendar and look for a high impact release before your expected exit. Reason: a scheduled event inside the window changes the risk you signed up for.
- Spread sits at or below your recorded normal. Test: current spread against the figure you logged for this pair at this hour. Reason: a widened spread quietly raises the cost of the whole trade.
- The setup matches a named rule. Test: say the rule out loud and point at the bar that satisfied it. Reason: an entry you cannot name is an entry you cannot review.
- Higher timeframe state written down before entry. Test: one sentence exists in the journal naming that state as up, down or unclear. Reason: writing it afterwards lets the outcome rewrite the reason.
- Target distance clears your minimum ratio. Test: target distance divided by stop distance, compared against the plan minimum. Reason: taking sub-threshold trades slowly changes the maths of the whole account.
- Journal row opened before the order goes out. Test: a row exists holding entry, stop, target and rule name. Reason: a record created before the result cannot be edited by hindsight.
Why the Risk Checks Earn Their Place
Three of the twelve deal with money rather than markets. They come first because they cost nothing and prevent the largest single losses.
Risk Per Trade
Pick one figure and apply it to every trade. Many traders settle somewhere between half a percent and one percent of the account.
The number matters far less than its stability. A fixed fraction keeps every result comparable, which turns a messy history into data you can actually read.
Our guide on risk per trade covers how to choose the figure and when to revisit it.
The Stop Price Comes First
Decide where the idea dies before you decide anything else. That price defines the trade far more precisely than the entry does.
Traders who enter first end up placing the stop where the loss feels tolerable. Price does not care what feels tolerable, so those stops sit in obvious places and get taken.
Write the number, then check that a real structure sits behind it. A swing point, a session extreme or a volatility multiple all qualify.
Size From the Stop, Never From Habit
Lot size follows from two inputs: the money you accept losing and the distance to the stop. Nothing else belongs in that calculation.
Wide stops therefore demand smaller positions, and tight stops allow larger ones. Traders who use the same lot size everywhere accept wildly different risk on every trade without noticing.
Our position size calculator does the arithmetic, though the discipline of checking it stays yours.
The Checks That Stop Small Losses Compounding
Three more checks look past the single trade. They exist because accounts rarely die from one loss.
Daily Loss Limit
Set a floor for the day and treat it as a hard stop on activity. Two or three times your per trade risk works for most people.
Once the floor breaks, the platform closes. The test takes two seconds, and it removes the exact hour in which traders do the most damage.
Our note on the daily loss limit explains how to pick a floor you will actually respect.
Total Open Risk
Add the risk on everything currently running before you add another position. Express the total in R so the comparison stays simple.
Three positions at one R each mean three R on the table. Should a shared driver move against all three, you collect the whole loss at once.
Most traders cap total open risk somewhere between two and four R. Choose your number now, while nothing sits on the screen.
Currency Overlap
Two pairs sharing a currency often move together. Buying one while buying the other rarely doubles the diversification, though it reliably doubles the exposure.
The check runs fast: read the six letters of each open position and look for a repeat. Yes means either skip the trade or halve both sizes.
Direction matters as well as overlap. Long on one pair and short on another that shares a currency can partly cancel, while two trades in the same direction stack up instead.
None of this needs a correlation study before every order. Reading the tickers catches the obvious cases, and the obvious cases cause most of the damage.
Running the Checklist Against an Account
Numbers make the gate concrete. Picture a hundred candidate trades over a quarter, each one run through the twelve items.
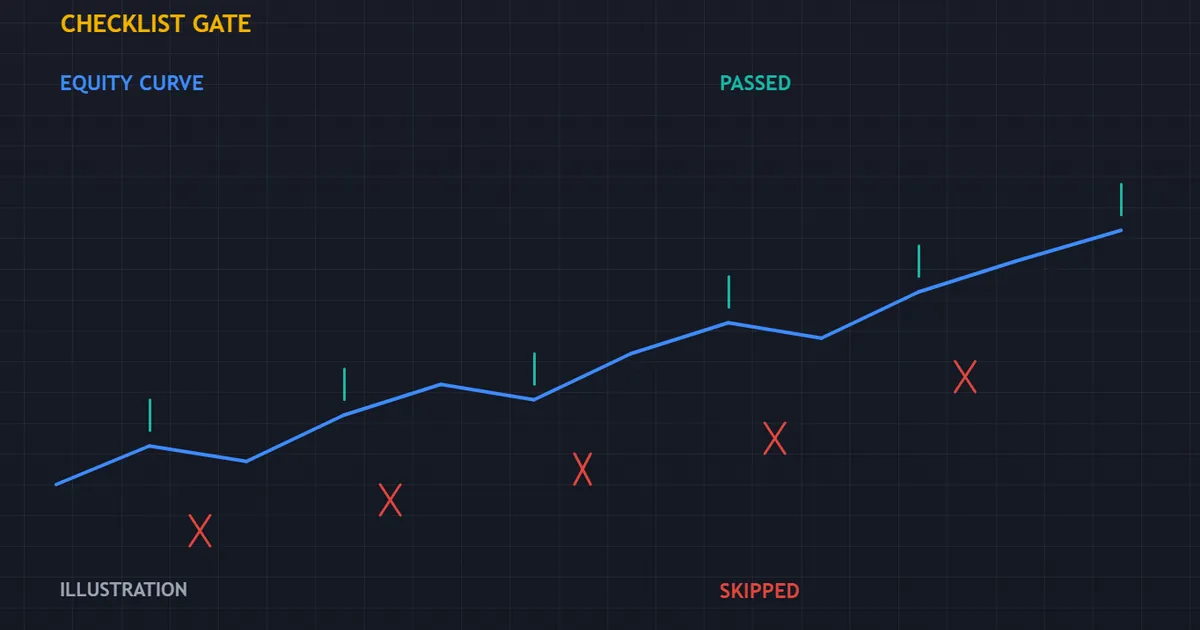
The panel above marks which candidates cleared the gate and which stopped at a failed line. Roughly a third of that hundred fail somewhere, and most of those fail on the calendar check or the ratio check.
What the Gate Changes and What It Does Not
Fewer trades reach the market, so the sample grows more slowly. Cost per unit of activity drops, because skipped trades pay no spread.
None of that promises a better result. It promises a cleaner one, since every trade in the record shares the same entry conditions.
That consistency is the point. A messy record cannot tell you whether a rule works, no matter how long you keep it.
Download the complete indicator database
Put these concepts on your charts. One email unlocks the full library of 1,380+ indicators with compiled MT4 and MT5 files, plus my TradingView scripts. No paywall, no spam, unsubscribe any time.
Get free access to my indicator database
One email unlocks 1,380+ free MT4, MT5 and TradingView indicators — the complete library. No single-tool download; you get the whole database.
Market Condition Checks
Two items look at the market you are about to enter rather than at your account. Both take under a minute.
The Calendar Covers Your Holding Window
Look forward from now to your expected exit, not merely at the next hour. A swing trade held for three days needs three days of calendar.
Mark any high impact release inside that span. Then choose deliberately: skip the trade, cut the size, or accept the event and write down that you accepted it.
Our free economic calendar makes the scan quick enough to run on every single setup.
Spread Against Your Recorded Normal
Log the typical spread for each pair you trade, hour by hour. One quiet week of observation gives you the baseline.
Then compare before entry. A spread sitting well above normal usually means thin liquidity, and thin liquidity turns your stop into a lottery ticket.
Scalpers feel this hardest, because cost eats a larger share of a small target. Position traders can often shrug it off.
Setup and Record Checks
The last three items make the trade reviewable later. Skipping them costs nothing today and everything at the monthly review.
Name the Entry Rule
Your plan should hold a short list of named entries. Saying “pullback to the twenty period average in an uptrend” takes two seconds.
An entry you cannot name did not come from the plan. That does not make it wrong, though it does make it untestable, which amounts to the same thing over a year.
Keep the roster small. Two or three named entries give each one enough occurrences to judge, whereas nine leave you with a handful of trades per rule and no way to separate skill from chance.
Write the Higher Timeframe State Down
One sentence, before entry, naming the higher timeframe as up, down or unclear. The point is timing, not insight.
Written afterwards, that sentence always agrees with the outcome. Written first, it becomes evidence you can test.
Traders often discover that their losses cluster in the “unclear” bucket. Nobody finds that out without recording it in advance.
Open the Journal Row Before the Order
Fill entry, stop, target and rule name, then send the order. The sequence matters more than the tooling.
Our free trade journal holds the fields in one place, and a spreadsheet does the job equally well.
Common Mistakes and Their Fixes
Five habits turn a good list into decoration. The panel below sets each objective check against the vague version traders reach for instead.
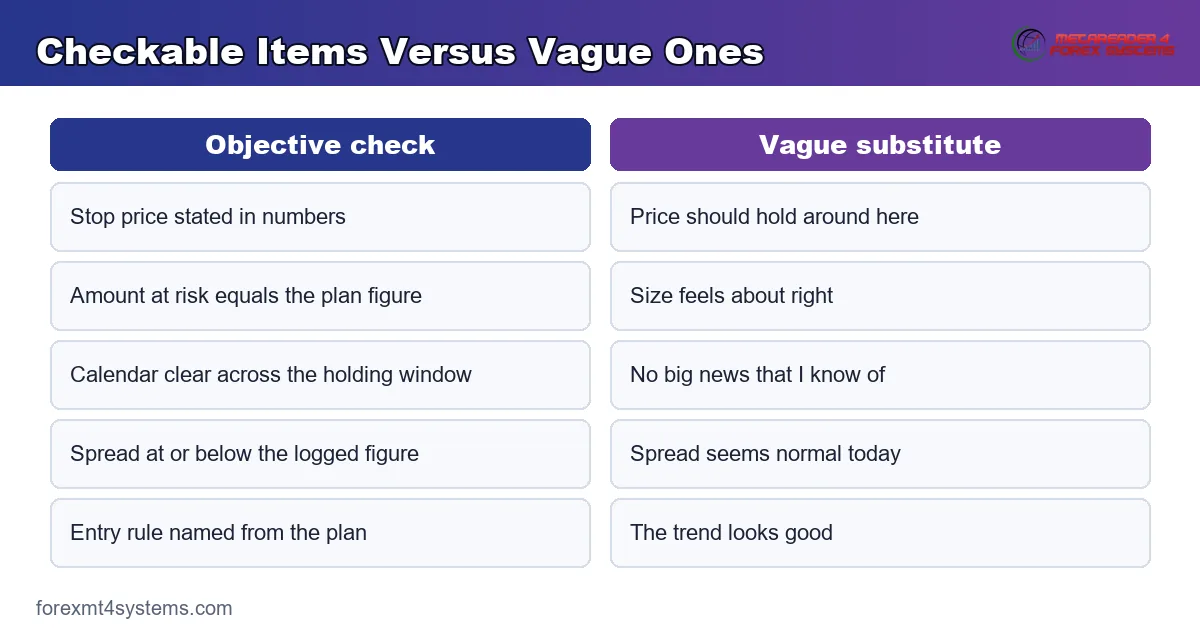
Writing Items Nobody Can Fail
“Confirm the trend” and “check the news” both pass automatically, because neither names a test. Rewrite each one until it points at a number, a price or a file.
Running the List After Entry
A checklist completed once the position exists only records what you already did. Run it before the ticket, every time.
Making It Too Long to Use
Thirty items ensure that you skip some of them under pressure. Twelve fits on one screen and survives a fast market.
Allowing Just This Once
Every override feels reasonable at the time. Log the override in the journal instead of quietly granting it, and the pattern shows up inside a month.
Never Revising the List
Review the checks each quarter against your own records. Items that never fail add friction without filtering, so retire them and add the ones your losses point to.
The Quick Reference Table
Keep this within reach of the platform. It compresses the twelve items into the test and the failure each one prevents.
| Check | Objective test | Failure it prevents |
|---|---|---|
| Risk per trade | Amount at risk equals the plan figure | Size creep after a losing run |
| Stop price set | Exact price typed before entry | A trade with no defined loss |
| Size from stop | Lots recomputed from stop distance | Wide stops carrying full size |
| Daily floor intact | Closed result sits above the floor | Trading through a bad day |
| Total open risk | Sum of open risk under the cap | Correlated positions landing together |
| Currency overlap | No shared currency with open trades | One view held twice |
| Calendar window | No high impact release before exit | Volatility you never agreed to |
| Spread normal | Spread at or below the logged figure | Paying a thin liquidity premium |
| Named entry rule | Rule stated and bar identified | Improvised entries nobody can review |
| Higher timeframe noted | Sentence written before entry | Hindsight rewriting the reason |
| Ratio threshold | Target over stop clears the minimum | Sub-threshold trades diluting the plan |
| Journal row open | Row exists with all four fields | A record edited after the result |
What Skipped Checks Actually Cost
Skipping feels harmless because nothing happens immediately. The cost arrives later, and it arrives grouped.
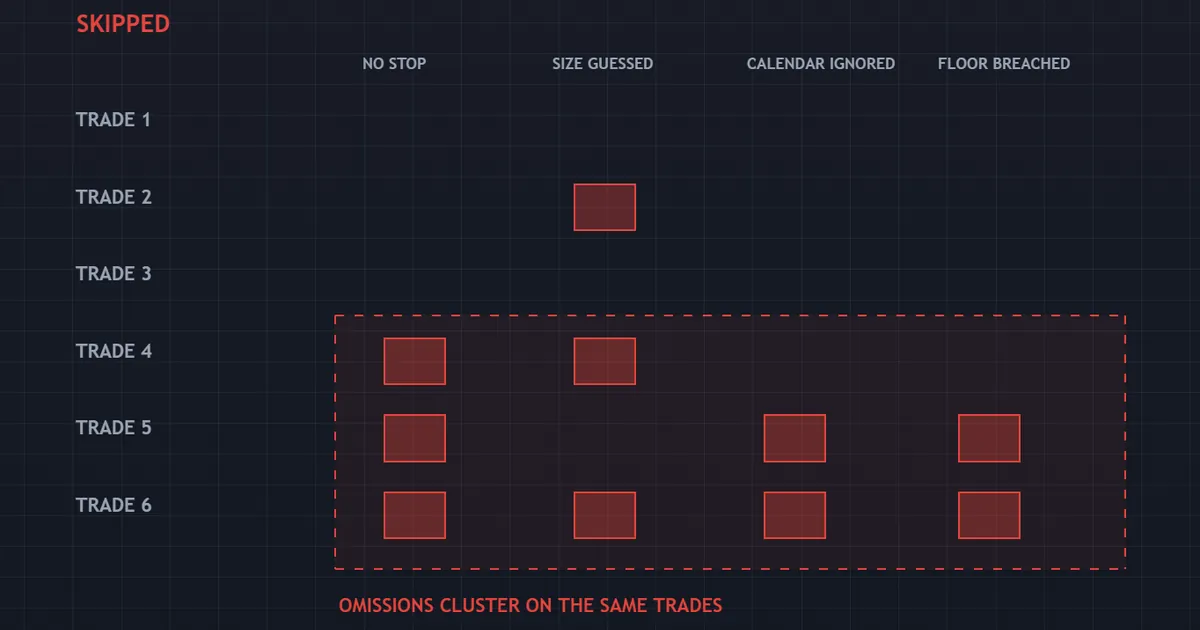
The panel above traces a run of trades where several checks went unrun. Notice how the omissions cluster rather than scatter.
Omissions Arrive in Groups
Nobody skips the calendar check on a calm morning. They skip it while chasing a move, which is precisely when the size check and the ratio check also go unrun.
So one skipped line usually signals three. Reviewing which check failed first therefore tells you more than reviewing the loss itself.
The Fix Is Mechanical
Put the list where the order goes, not in a document you open on Sundays. A sticky note beside the platform beats a beautiful file you never load.
Then log the skip when it happens. Counting skips over a month gives you a far better read on your discipline than any memory ever will.
Some traders add a single column to the journal holding the number of checks completed. Twelve out of twelve on a losing trade tells a very different story from seven out of twelve.
Building the List From Your Own Losses
Borrowed lists work fine as a starting point. Yours should end up different, because your errors differ from mine.
Read Twenty Losing Trades
Pull the last twenty losses out of your journal and read them in one sitting. Ignore the market commentary and look only at what you did.
Then group them by cause: no stop, oversized, entered into a release, no named rule, traded past the floor. Four or five buckets usually cover almost everything.
Turn the Biggest Bucket Into a Check
Take whichever bucket holds the most trades and write a check that would have blocked them. Phrase it so it can fail.
“Be more patient” fails nothing at all. “No entry within thirty minutes of a high impact release” fails cleanly, and it points at a calendar anyone can open.
Add One Item at a Time
Resist the urge to fix everything this weekend. One new check, held for a month, produces evidence about that check.
Five new checks at once tell you nothing about which one helped. Slow beats thorough here, and a short list survives a fast market.
Related Guides Worth Reading Next
A checklist works inside a plan, so the plan comes first. Our guide to what a trading plan is covers the document the checks draw from.
After that, look at cadence. Our walkthrough of a daily trading routine shows where the checklist sits inside the wider day, and our note on what a trading journal is covers the record it feeds.
Traders who want conditions flagged automatically can browse our MetaTrader indicators library. Any tool of that kind serves as a prompt, and the judgement stays with you.
FAQ
How long should a pre trade checklist take to run?
Under a minute once you know it. Most items take a glance, and only the calendar scan and the size recomputation take real seconds. If your list needs five minutes, it holds items that belong in your weekly preparation rather than at the order ticket. Move them there and keep the ticket list short.
What makes a checklist item objective?
It points at something outside your opinion. A price, a currency amount, a ratio, a calendar entry or a file all qualify, because another trader could check them and reach the same answer. Anything that depends on how the chart feels belongs in your strategy notes, not on a gate that has to produce a yes or a no.
Should scalpers use the same twelve checks?
The items stay, though the speed changes. Scalpers usually front-load most of the list into a session preparation block, then run only the live ones before each entry: spread, open risk and the daily floor. Cost checks matter far more at that frequency, since spread consumes a larger share of every target.
What happens when a trade fails one check?
You skip it, or you fix the thing that failed. A ratio below threshold sometimes clears once you move the target to a sensible structure, and an oversized position clears once you recompute the lots. What you should not do is note the failure and trade anyway, because that turns the list into paperwork.
Does a checklist replace a trading plan?
No, and the two work at different levels. The plan says which markets you trade, which setups you take and how much you risk. The checklist confirms that this specific order obeys those decisions. Without the plan, the checks have nothing to compare against.
Where should the checklist physically live?
Next to the order ticket, in whatever form you will actually read. A printed card taped beside the monitor works, and so does a pinned note in the platform or a template row in your journal. What fails almost every time is a beautifully formatted document three clicks away, because three clicks are exactly what a hurried trader skips.
How often should the list change?
Review it quarterly against your own records. Retire any item that has never once failed, since it adds friction without filtering anything, and add an item for whatever your losing trades keep having in common. Treat the list as a living document that follows your evidence rather than a fixed ritual. Results are not guaranteed; past performance is not indicative of future results.
External references
- For background on this concept, see Preflight Checklist on Wikipedia.
- For broader market context, see Scenario Analysis at Investopedia.

About the author
Written by Dominic Walsh, a Forex trader and MT4/MT5 indicator, Expert Advisor and script developer. Every tool on forexmt4systems.com is tested on live charts before release and ships with ready-to-use compiled MT4 (.ex4) and MT5 (.ex5) files. Learn more about the trader and developer behind this site.
How we build, test and correct every tool: Editorial & Testing Policy. Trading carries risk; see the disclaimer.