
Two orders sit on the chart as identical horizontal lines. Stop order vs limit order is a comparison about what happens the moment price touches that line, and the two answers could hardly differ more.
A stop turns into a market order and takes whatever the book offers. A limit fills at your price or better, or it never fills at all.
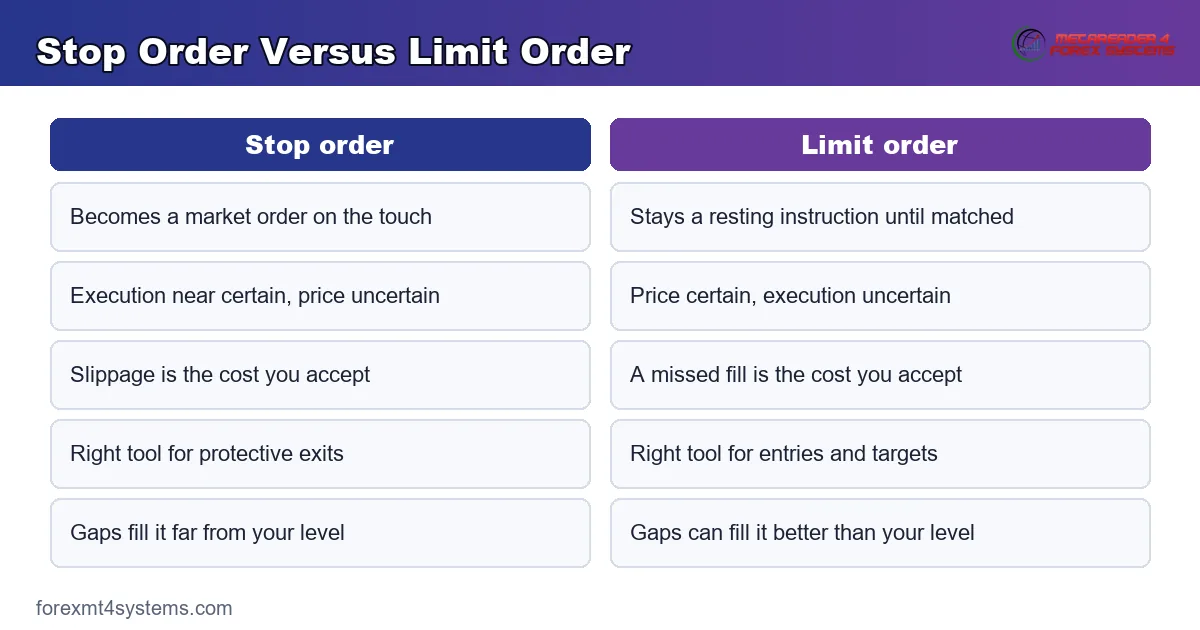
Stop Order vs Limit Order: Two Different Promises
Each instruction makes exactly one promise. Neither one makes the other.
So the choice is really a question about which failure you can live with. A stop can fill at a worse price than you wanted, while a limit can leave you with no position at all.
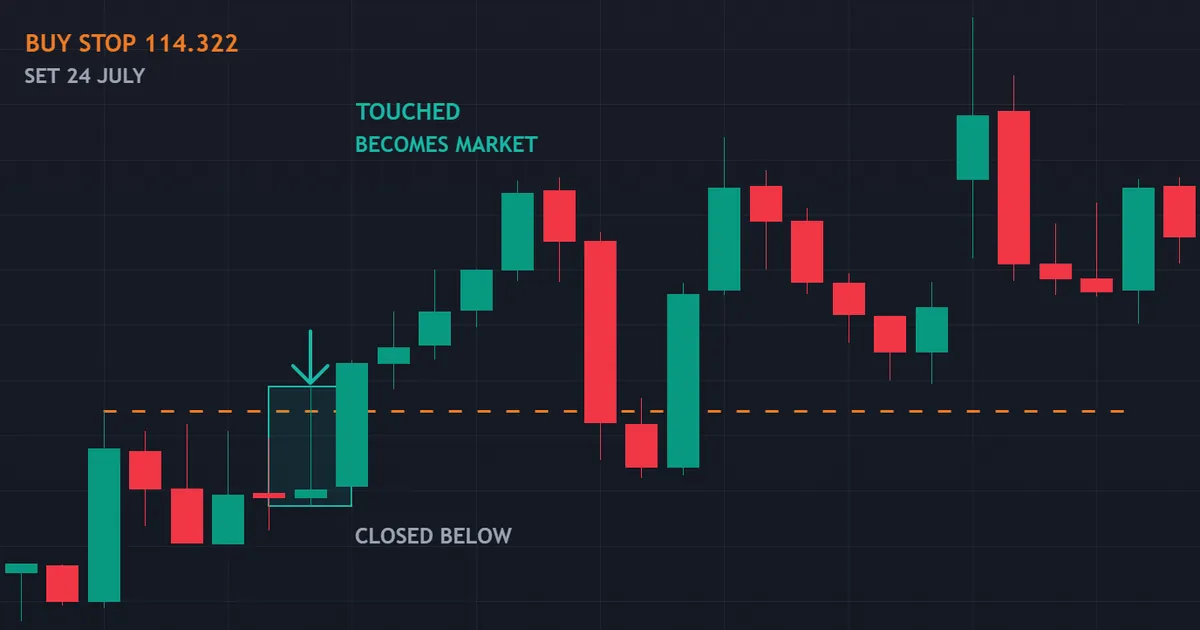
Above sits a buy stop on AUDJPY hourly bars at 114.322, set at midnight on 24 July 2026. Price triggered it during the 05:00 hour, an hour that opened at 114.244 and reached 114.344 before closing back at 114.251.
Notice the close. That hour finished below the trigger, so the position sat offside within minutes of opening.
The Stop Order Promise
A stop order says: once price reaches this level, get me in or out immediately. From that instant the instruction behaves like a market order.
Execution therefore becomes near certain. Price paid becomes uncertain, which is the entire cost of the promise.
That trade suits protective exits perfectly. If a position has gone wrong, you need out far more than you need a specific number.
The Limit Order Promise
A limit order says: fill me at this level or better, and otherwise leave me alone. It never accepts a worse price than the one you typed.
Price paid therefore becomes certain. Execution becomes uncertain, so a market that turns one pip short of your level leaves you empty-handed.
That trade suits entries and profit targets. Neither of those has to happen today, so waiting costs you little.
Why Both Sit on the Same Chart Line
Platforms draw both as a plain horizontal line. Nothing in the drawing tells you which instruction sits behind it.
So check the order list rather than the chart. Two lines at the same price can behave in opposite ways, and only the ticket says which one you have.
Screenshots make this worse. A picture of a level teaches nothing about execution, which is why the order type belongs in your notes.
How Each One Executes
The mechanics take five steps. Only steps three and four differ.
- You set a level and a size. The instruction rests on the broker’s server until price arrives.
- Price reaches the level. Both order types wake up at exactly the same moment.
- A stop converts to a market order. It sweeps the book for your size and accepts whatever prices it finds.
- A limit matches only at your price or better. If the book has nothing at that level, the order simply keeps waiting.
- Confirmation arrives. The stop reports a fill you did not choose, while the limit reports either your price or silence.
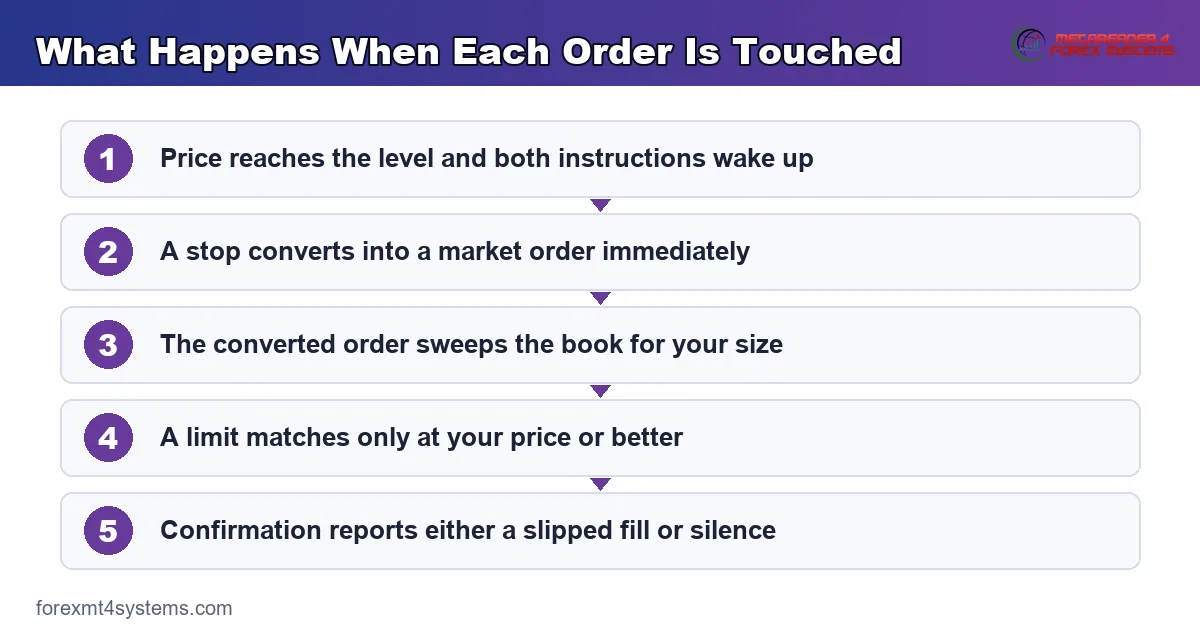
Step three creates slippage. Step four creates missed trades, and no single instruction avoids both.
The Moment a Stop Converts
Conversion happens on a touch, not on a close. One tick through your level activates the order, even if the bar closes far away.
Fast markets therefore fill stops badly. The book thins out, your market order walks down the queue, and the average price drifts.
Nothing about that behaviour counts as misconduct. It describes what happens when price moves between the trigger and the match.
The Moment a Limit Matches
A limit needs a counterparty at your price. If the market trades through the level without leaving size behind, your order can sit unfilled inside a move that visibly happened.
Partial fills follow the same logic. You get whatever size the book offered at your price, and the rest keeps waiting.
Gaps behave differently again. A buy limit inside a downward gap fills at the open, which hands you a better price than you asked for.
Why the Printed Low Can Sit Above Your Fill
Charts usually print bid prices. A purchase, though, fills at the ask, which sits a spread above the bid at every moment.
So a buy limit can fill even when the printed low stops a fraction above your level. The ask reached your number while the bid never did.
Check your platform’s setting before you argue with it. Many terminals offer an ask-price line precisely to remove this confusion.
Time in Force and Expiry
Both instructions carry a lifetime. Some rest until you cancel them, while others expire at the end of the day or at a time you pick.
Read that setting before you walk away. An order surviving the weekend can trigger into Monday’s gap on a reason that expired on Friday.
Set an expiry matching the idea behind it. Intraday setups rarely deserve more than the session that produced them.
The Jobs They Do
Both orders appear in every trading plan. They rarely swap roles successfully.
Stops for Exits
A protective exit has to execute. Leaving it as a limit means price can run straight past your level and leave the position open.
So the stop order earns its slippage here. Paying a few pips to close a losing trade beats holding it because a limit went unfilled.
Our guide to stop loss and take profit covers where each exit level belongs.
Limits for Entries and Targets
An entry can wait. A profit target can wait too, since neither has a deadline attached.
Limits therefore fit both jobs. You name the price, and the market either comes to you or it does not.
Missing a target costs less than most traders assume. The position stays open, so the trade simply continues.
Where the Roles Overlap
Breakout entries use stop orders, which surprises people. You want in only once price proves it can reach the level, so certainty of participation matters more than the tick.
Trailing exits use stops as well. The level moves with price, and the promise stays identical.
Our stop order guide works through each of those uses in detail.
The Third Instruction Between Them
Platforms offer a hybrid that borrows from both. It answers the obvious question: can I have a trigger and a price cap together?
How the Hybrid Works
A stop-limit order carries two numbers. The stop price wakes the order up, and the limit price then caps what you will pay.
So it converts into a limit rather than into a market order. Price control returns, and certainty of execution disappears along with it.
The Trade-Off It Creates
In a fast move the order can miss entirely. Price runs through both numbers, the limit never matches, and you sit with nothing.
That risk makes it a poor choice for protective exits. Our guide to the stop limit order works through when the miss risk is worth accepting.
A Worked Example: The Limit That Caught the Dip
Limit entries look best when price comes to you and turns. The chart below shows one that did.
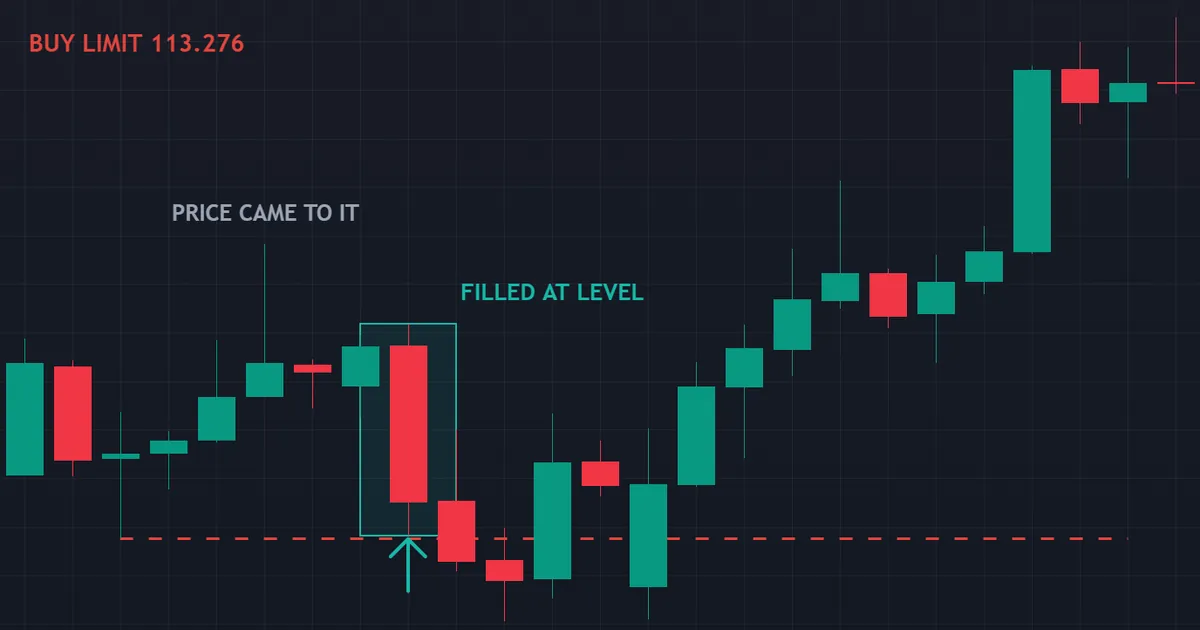
A buy limit rested at 113.276 on AUDJPY four-hour bars, set at 01:00 on 16 July 2026. Price slid into it during the 01:00 bar on 17 July.
What the Bar Showed
That bar opened at 113.673 and fell to a printed low of 113.282, then closed at 113.352. The ask reached the order while the printed bid stopped just short, which is the bid-ask gap described earlier.
Adverse movement after the fill measured 0.75 ATR. Favourable movement reached 5.32 ATR, so the entry level did its work.
Notice what the trader avoided. Buying at the open of that bar would have meant carrying an extra forty pips of drawdown for the same idea.
The Same Level as a Stop
Now change the instruction. A sell stop at 113.276 would have triggered on that same slide and sold into the low, which is the exact opposite trade.
One number, two instructions, two outcomes. The level tells you nothing without the order type attached to it.
Our comparison of the limit order in isolation covers the fill rules in more depth.
Download the complete indicator database
Put these concepts on your charts. One email unlocks the full library of 1,380+ indicators with compiled MT4 and MT5 files, plus my TradingView scripts. No paywall, no spam, unsubscribe any time.
Get free access to my indicator database
One email unlocks 1,380+ free MT4, MT5 and TradingView indicators — the complete library. No single-tool download; you get the whole database.
Slippage: The Cost of the Stop Order’s Promise
Every stop order accepts slippage in advance. Understanding it removes most of the frustration.
Where Slippage Comes From
Price moves between your trigger and your match. That is the whole mechanism, and it applies to every market with a spread.
Liquidity decides the size of the effect. Deep books absorb your order at one price, while thin books make it walk.
Our note on slippage in trading covers the measurement side.
When It Gets Worst
Three moments dominate. Scheduled releases, the Sunday reopen and the last minutes of the New York session all thin the book out.
Weekend gaps deserve special mention. Price can open far from Friday’s close, so a stop inside that distance fills at the open rather than at your level. Our weekend gap guide explains the mechanic.
Exotic crosses widen the effect further. Fewer participants means less size waiting at each price.
Requotes Are a Different Problem
Some accounts run instant execution, which fixes the quote before you trade. If price moves in the meantime, the platform returns a requote rather than a fill.
Market execution removes the requote and hands you slippage instead. Neither model wins outright, though the second suits stop orders far more comfortably.
Check which model your account uses before you judge a bad exit. The answer changes what you should expect from every stop you place.
What You Can Actually Control
You cannot control the book. You can control when you trade, how large you trade and how much room the stop has.
Wider stops absorb slippage comfortably. A trade risking sixty pips barely notices two, while a five-pip stop notices enormously.
Size the position from that distance rather than from habit. Our risk reward calculator shows what each stop distance does to the ratio.
Common Mistakes and the Fixes
Six habits produce most of the confusion between these two instructions. The panel below collects the corrections.
Using a Limit Where a Stop Belongs
Protective exits must execute. Swap any limit-based stop loss for a real stop order, then check the ticket rather than the chart line.
Expecting a Stop to Fill at Its Level
A stop names a trigger, not a price. Record both numbers after every exit, and the gap between them becomes your real slippage figure.
Setting Stops on Obvious Round Numbers
Crowds cluster there and probes reach them first. Offset the level using recent volatility, so a single spike does not decide the trade.
Blaming the Broker for Every Bad Fill
Check whether your slippage runs in both directions. Fills that improve as often as they worsen describe an ordinary market rather than a problem.
Placing Limits Where Price Never Trades
An ambitious level fills rarely. Measure recent pullbacks in ATR, then set the limit inside that observed range.
Forgetting Which Instruction Is Live
Old pending orders trigger into new conditions. Read the order list each evening, then cancel anything you cannot justify in a sentence.
Quick Reference: Which Promise You Need
Keep this table beside your platform for a fortnight. The distinction becomes automatic quickly.
| Job | Order type | The promise | The cost |
|---|---|---|---|
| Closing a losing trade | Stop | You get out | The exit price can slip |
| Entering on a breakout | Stop | You join the move | You buy at the extreme |
| Entering on a pullback | Limit | You get your price | Price may never return |
| Taking profit at a target | Limit | You exit at the number | The target may go untouched |
| Trailing behind a trend | Stop | The exit follows price | Give-back on the final move |
| Trading a release | Neither, usually | Nothing at all | Missing the first push |
Notice that no row calls one type better. Each row names a job and the price of doing it that way.
What Goes Wrong: The Break That Came Back
The breakout triggered the order and ran roughly 2.73 ATR higher within a day. Two days later price reversed through the level and reached about 1.98 ATR below it: a false break that took its time.

That instance sat on AUDJPY four-hour bars. A buy stop rested at 111.776 from 13:00 on 26 June 2026, and price triggered it during the 09:00 bar on 30 June.
The Bar That Triggered It
The bar opened at 111.697 and reached 111.895, clearing the level on the way up. It also traded down to 111.574 before closing at 111.812, so the session cut both ways within four hours.
Favourable movement reached 2.73 ATR on the very next bar. Adverse movement arrived two days later and reached 1.98 ATR, so anyone still holding gave back the gain and more.
Nothing on that bar marked it as unreliable in advance. Breakout bars that continue look much the same as breakout bars that fail.
Compare it with the first chart in this article. Both triggered a buy stop on a bar that cut both ways, yet only one of them held on to what it gained.
Why a Stop Order Cannot Prevent This
The order did its job perfectly. It triggered on the touch and delivered a fill, which is the only promise it ever made.
A limit at the same level would have behaved differently, though not better. A buy limit sits below price, so it never triggers on an upward break at all.
So the failure belongs to the trade idea, not to the instruction. Blaming the order type here would send you looking in the wrong place.
The Fix Lives in the Stop and the Size
Give the trade room measured from volatility rather than from comfort. Our note on what ATR means in trading covers that measurement.
Then size the position so the room costs a planned amount. Two ATR of heat becomes survivable at one lot size and ruinous at another.
Some traders wait for a close beyond the level instead of a touch. That filter removes some false triggers, and it also removes the earliest entries.
Building the Distinction Into Your Routine
Knowing the difference helps nobody until it reaches your ticket. Three habits close that gap.
Name the Promise Before You Type
Ask which failure you can accept on this trade. If a missed fill would ruin the idea, use a stop; if a bad price would ruin it, use a limit.
Saying that sentence takes two seconds. Fixing a reversed instruction after the fact takes considerably longer.
Record Trigger and Fill Separately
Two columns in your journal answer most execution questions. One holds the level you set, and the other holds the price you got.
After a hundred trades the average gap tells you what your broker and your timing really cost. Guesses cannot compete with that number.
Review the Unfilled Limits Monthly
Pull up every limit that expired untouched. Ask whether the level sat too deep, or whether the idea itself never arrived.
Change one thing after that review, then leave it alone for a month. Adjusting two rules at once teaches you nothing about either.
Test the Behaviour With Small Size
New broker, new platform or new instrument: place one small order of each type and watch what happens. Ten minutes of testing beats an argument after a real position goes wrong.
Write down what you find alongside your trades. Execution behaviour varies more between accounts than most traders expect, and nobody else can measure yours.
Let the Records Choose Your Default
Count how often your limits miss and how often your stops slip. One of those numbers usually dominates the other on your pairs and your timeframe.
Then set a default and hold it for a quarter. Switching instructions after every disappointing trade leaves you nothing to learn from.
Related Concepts Worth Reading Next
Execution mechanics connect to several other ideas. Two of them repay attention immediately.
Read our breakdown of the trailing stop alongside this comparison, since it applies the stop-order promise to an exit that keeps moving.
After that, browse our volatility indicators archive. Stop distance, limit distance and slippage tolerance all follow from how far a market currently travels.
FAQ
Which order type is safer?
Neither, since they fail in different ways. A stop can fill at a worse price than you planned, and a limit can leave you holding no position while the move happens. Match the instruction to the job instead of hunting for a safer one.
Can a limit order act as my stop loss?
Not reliably. A protective exit has to execute, and a limit only fills at your price or better, so a fast move can run straight past it. Use a stop order for that job and accept the slippage it brings.
Why did my stop fill so far from the level?
Because the book had no size at your number. The order converted to a market order on the touch, then swept whatever prices it found. Releases, weekend opens and thin crosses all widen that distance.
Does a limit order ever fill at a better price?
Yes, and gaps are the usual reason. A buy limit inside a downward gap fills at the opening price, which sits below the level you set. Positive slippage runs in your favour on limit orders by design.
What is a stop-limit order then?
A hybrid. The stop price wakes the order up, and a limit price then controls the fill, so it can miss entirely in a fast move. Traders use it when a bad fill would hurt more than no fill at all.
Should breakout traders use stops or limits?
Stops, in almost every case. A breakout entry needs price to prove it can reach the level, and only a stop order participates once that happens. The cost is buying at the extreme of the move.
Do these orders behave the same at every broker?
The logic holds everywhere, though the details vary. Some brokers apply a minimum distance from the current price, some cancel pending orders at rollover, and a few handle weekend gaps differently. Read the execution policy once, then test with a small order before you rely on the behaviour.
How do I measure my own slippage?
Log the trigger level and the fill price for every stop, then average the difference by session and by pair. A month of records usually shows a clear pattern, and it beats any advertised figure. Judge the result over a long run rather than one bad exit. Results are not guaranteed; past performance is not indicative of future results.
External references
- For background on this concept, see Limit Order at BabyPips Forexpedia.
- For broader market context, see Stop Order at Corporate Finance Institute.

About the author
Written by Dominic Walsh, a Forex trader and MT4/MT5 indicator, Expert Advisor and script developer. Every tool on forexmt4systems.com is tested on live charts before release and ships with ready-to-use compiled MT4 (.ex4) and MT5 (.ex5) files. Learn more about the trader and developer behind this site.
How we build, test and correct every tool: Editorial & Testing Policy. Trading carries risk; see the disclaimer.